I bought the excellent OM System’s OM-1 camera in may 2022. Since then there have been two firmware updates for the camera. There have been a few reports of people failing to update the firmware, resulting in a camera that won’t even start, and which needs to be fixed by OM System’s support. So I was a bit apprehensive of doing it, but it went fine for me. This blog article describes how I did my firmware update, and should also be of interest to those OM-1 owners who only use Linux.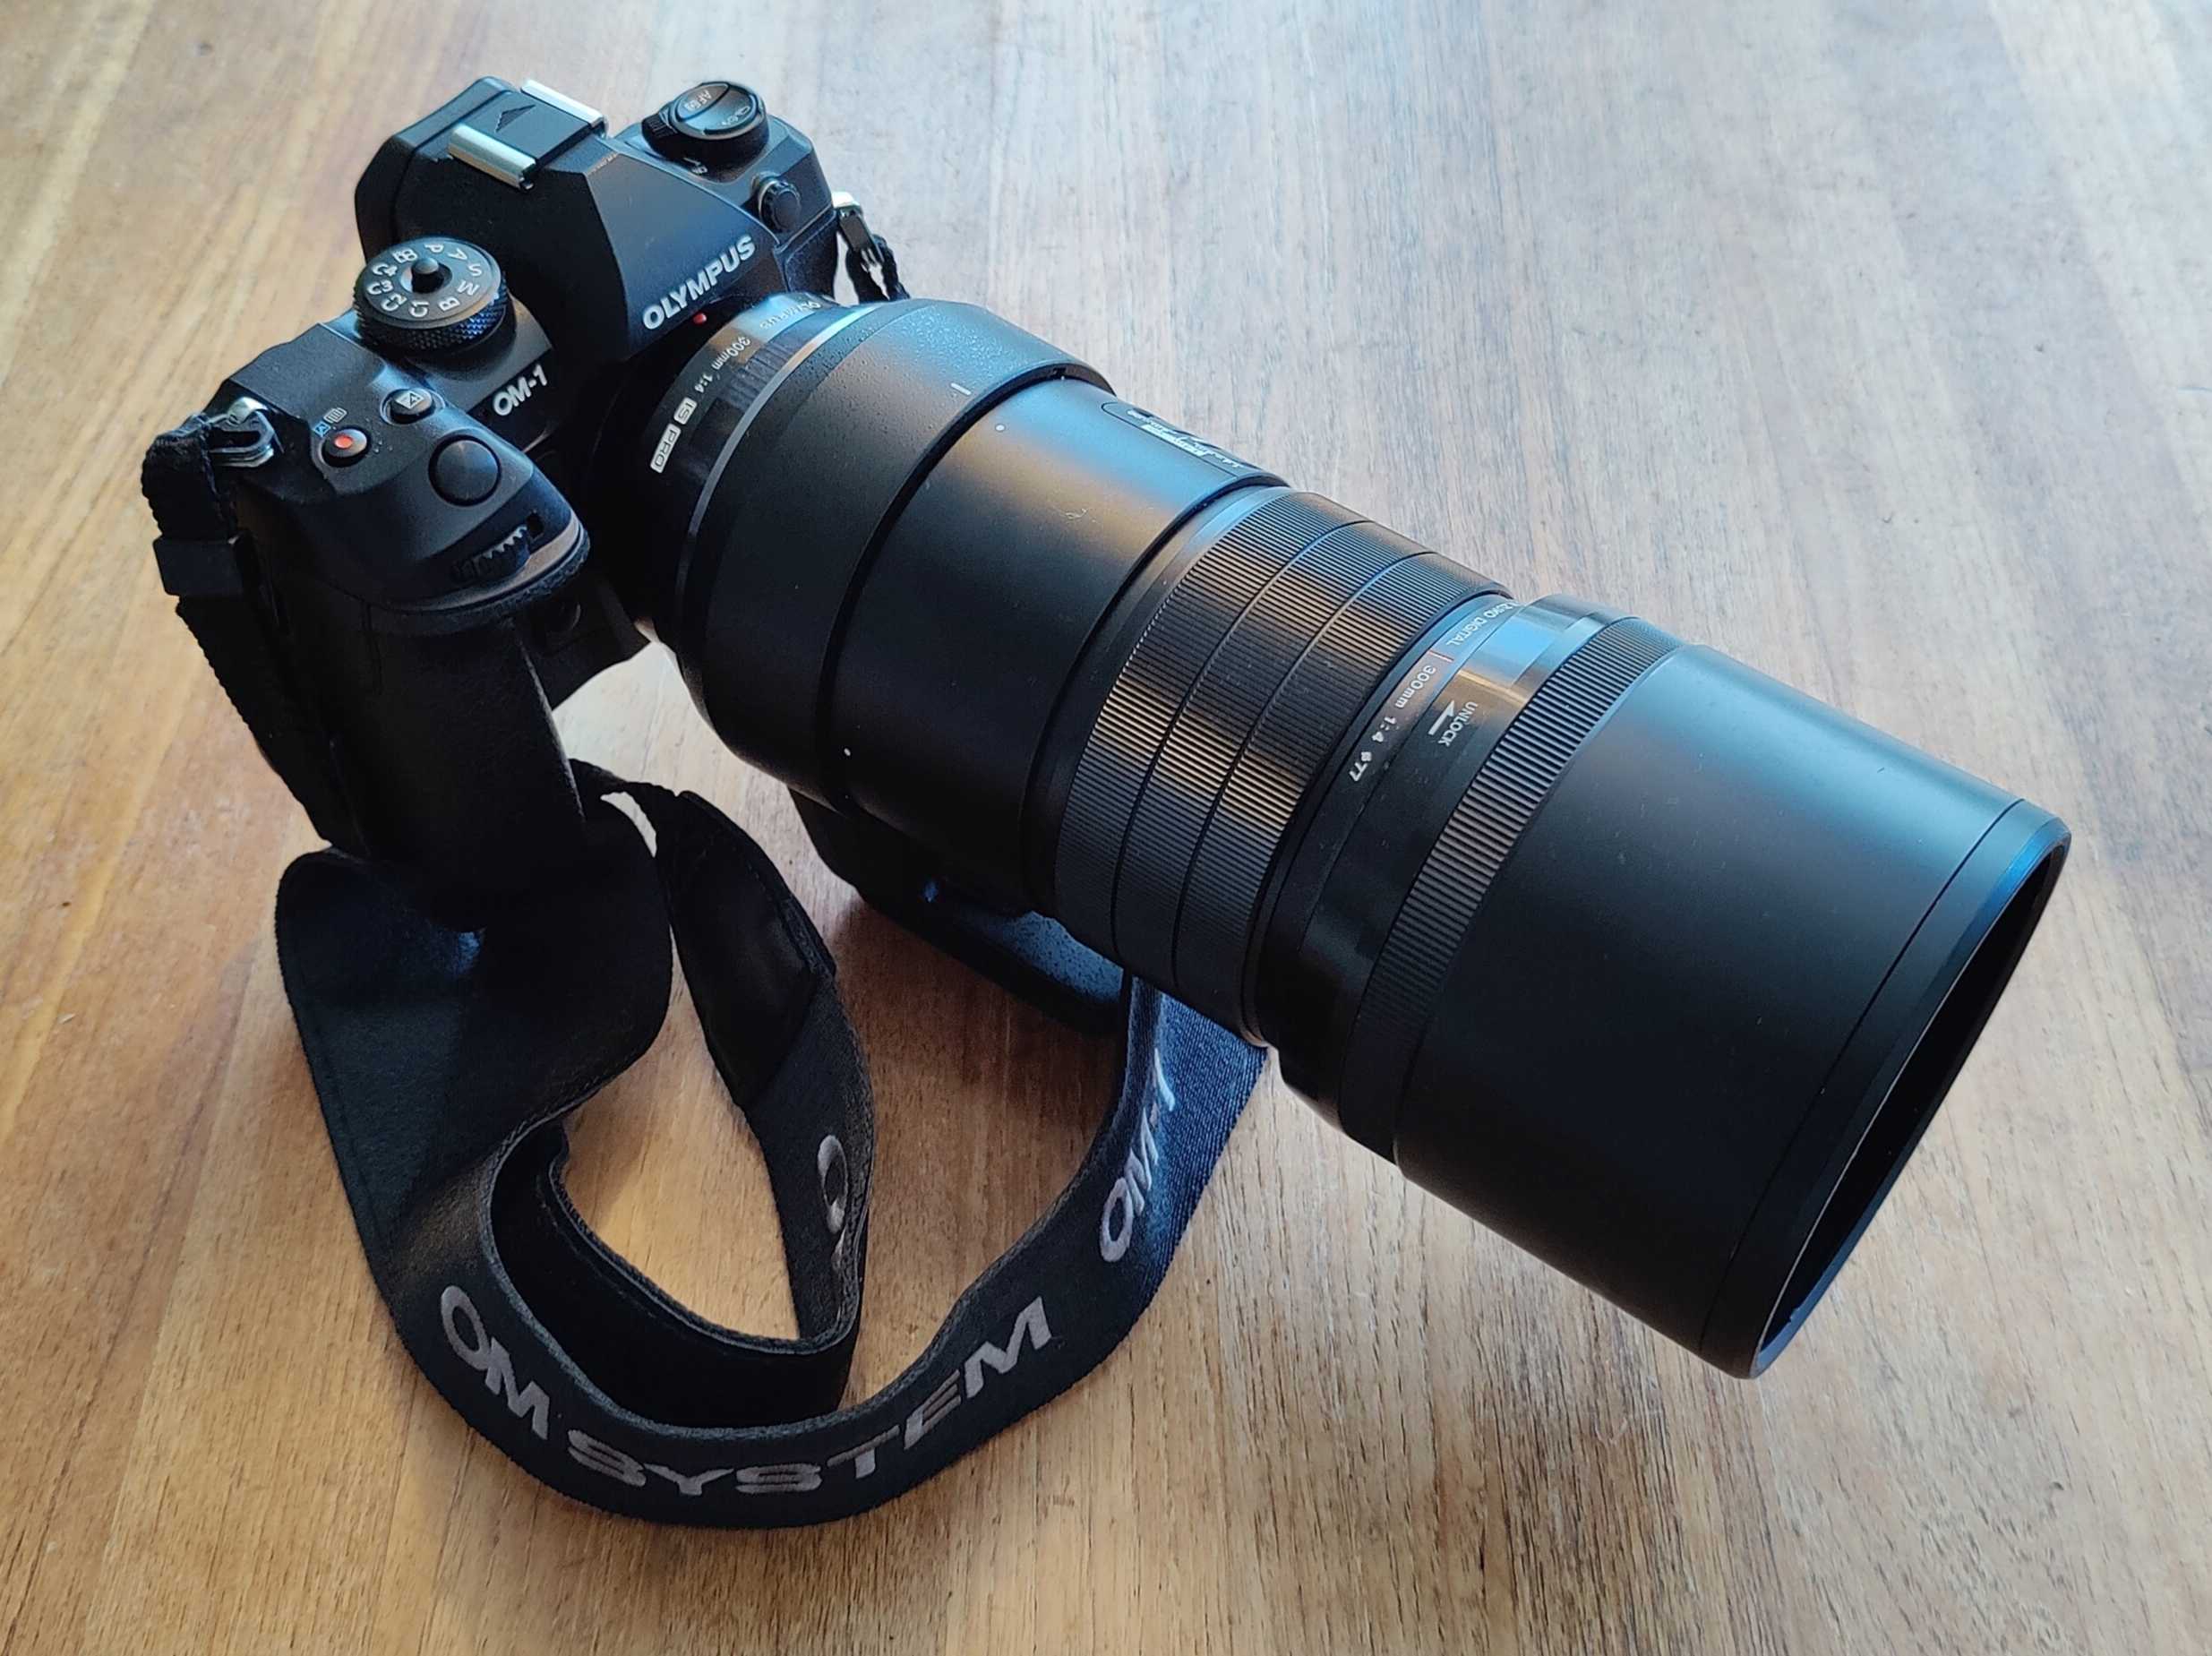
To update the firmware you have to use the Om Workspace program from OM Systems and then connect the camera to your computer, and then perform the update from within that program. Unfortunately OM Workspace only works on Mac and Windows, so I had to borrow my son’s Windows gaming PC for this.
Changes in the firmware updates
The release notes for the two firmware updates can be found on OM Systems download page for OM‑1.
Main improvements in firmware version 1.2:
- Performance of C-AF when shooting still images has been improved.
- Enhanced stability of operation when shooting video.
Main improvements in firmware version 1.1:
- Addresses an issue of the OM-1 freezing.
- Improvement of stability of connection with “Atomos Ninja V”.
My steps
My starting point was this instruction page from OM system. In the video on that page he mentions that you need to first do the first update, then the second. When I updated I was only presented with the ability to do the second update directly, and that worked fine for me.
I did my update on a Windows 11 Pro machine. Although I’m describing how I did it, I’m writing the steps in imperative mode.
- Install OM Workspace and make sure you have the latest version installed.
- Make sure your user account has administrator priviledges, otherwise you will not be able to update the firmware.
- Make sure that the camera battery is fully charged.
- Take the USB-C cable that came with camera, which is also used to charge it, and connect your camera to the PC with it. Note that it is an USB-C to USB-C cable, so you need an USB-C port on your PC. See below for my fancy setup.

- Turn on the camera. Since the USB-C cable is attatched, you will be presented with a menu where you can select the USB mode of the camera, select
Storage. - Start the OM Workspace program. Select the menu alternative
Camera->Upgrade. You will then first be presented with an informative dialog telling you to not disconnect the camera during the update, and then when you click on the OKbutton, you will be presented with a dialog where you select the firmware you want to update to.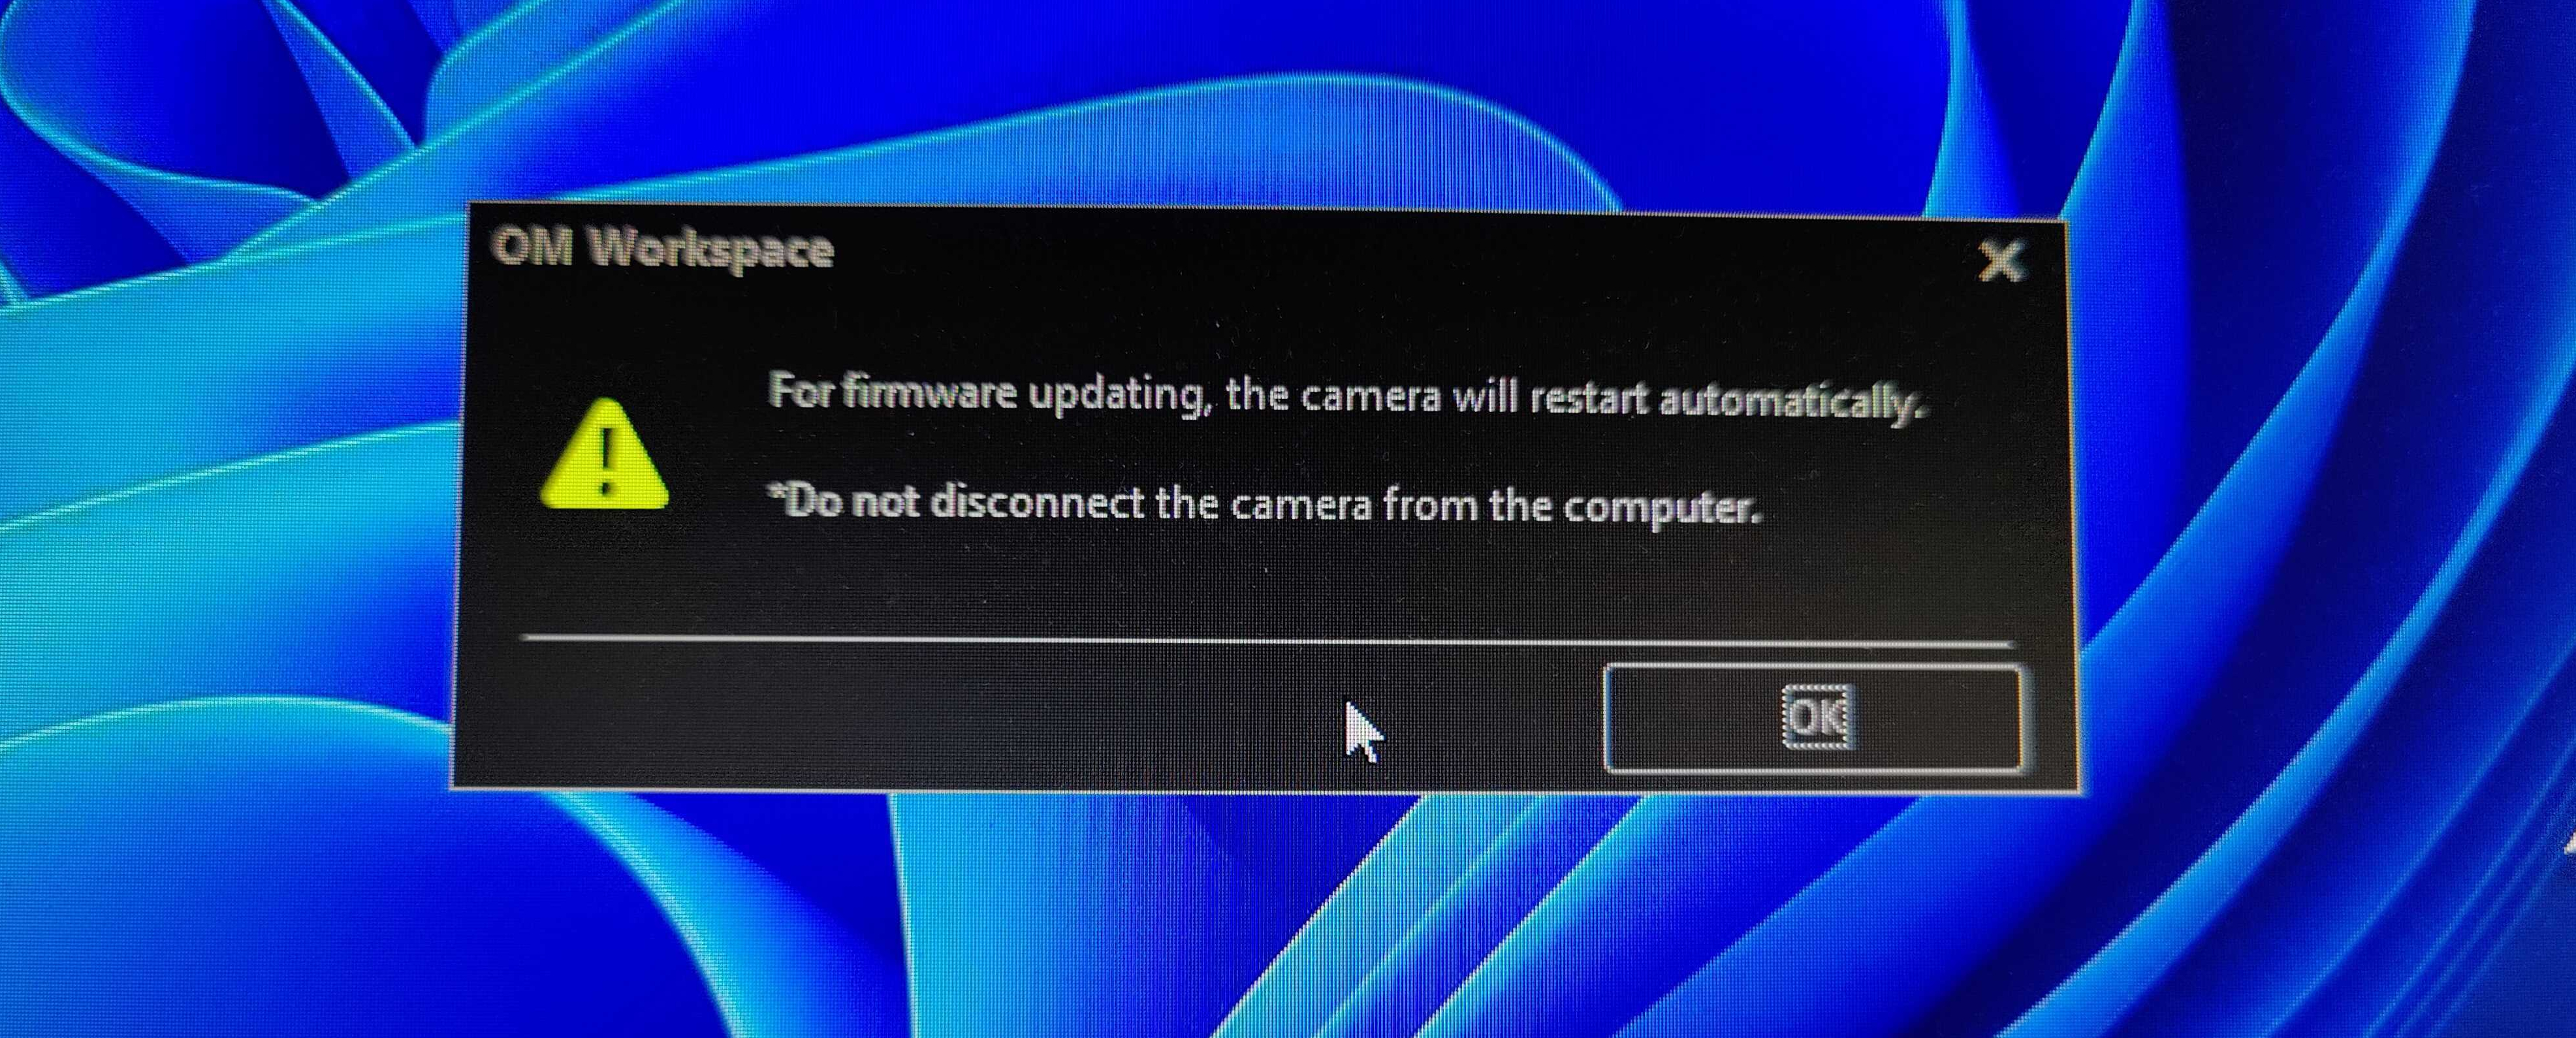
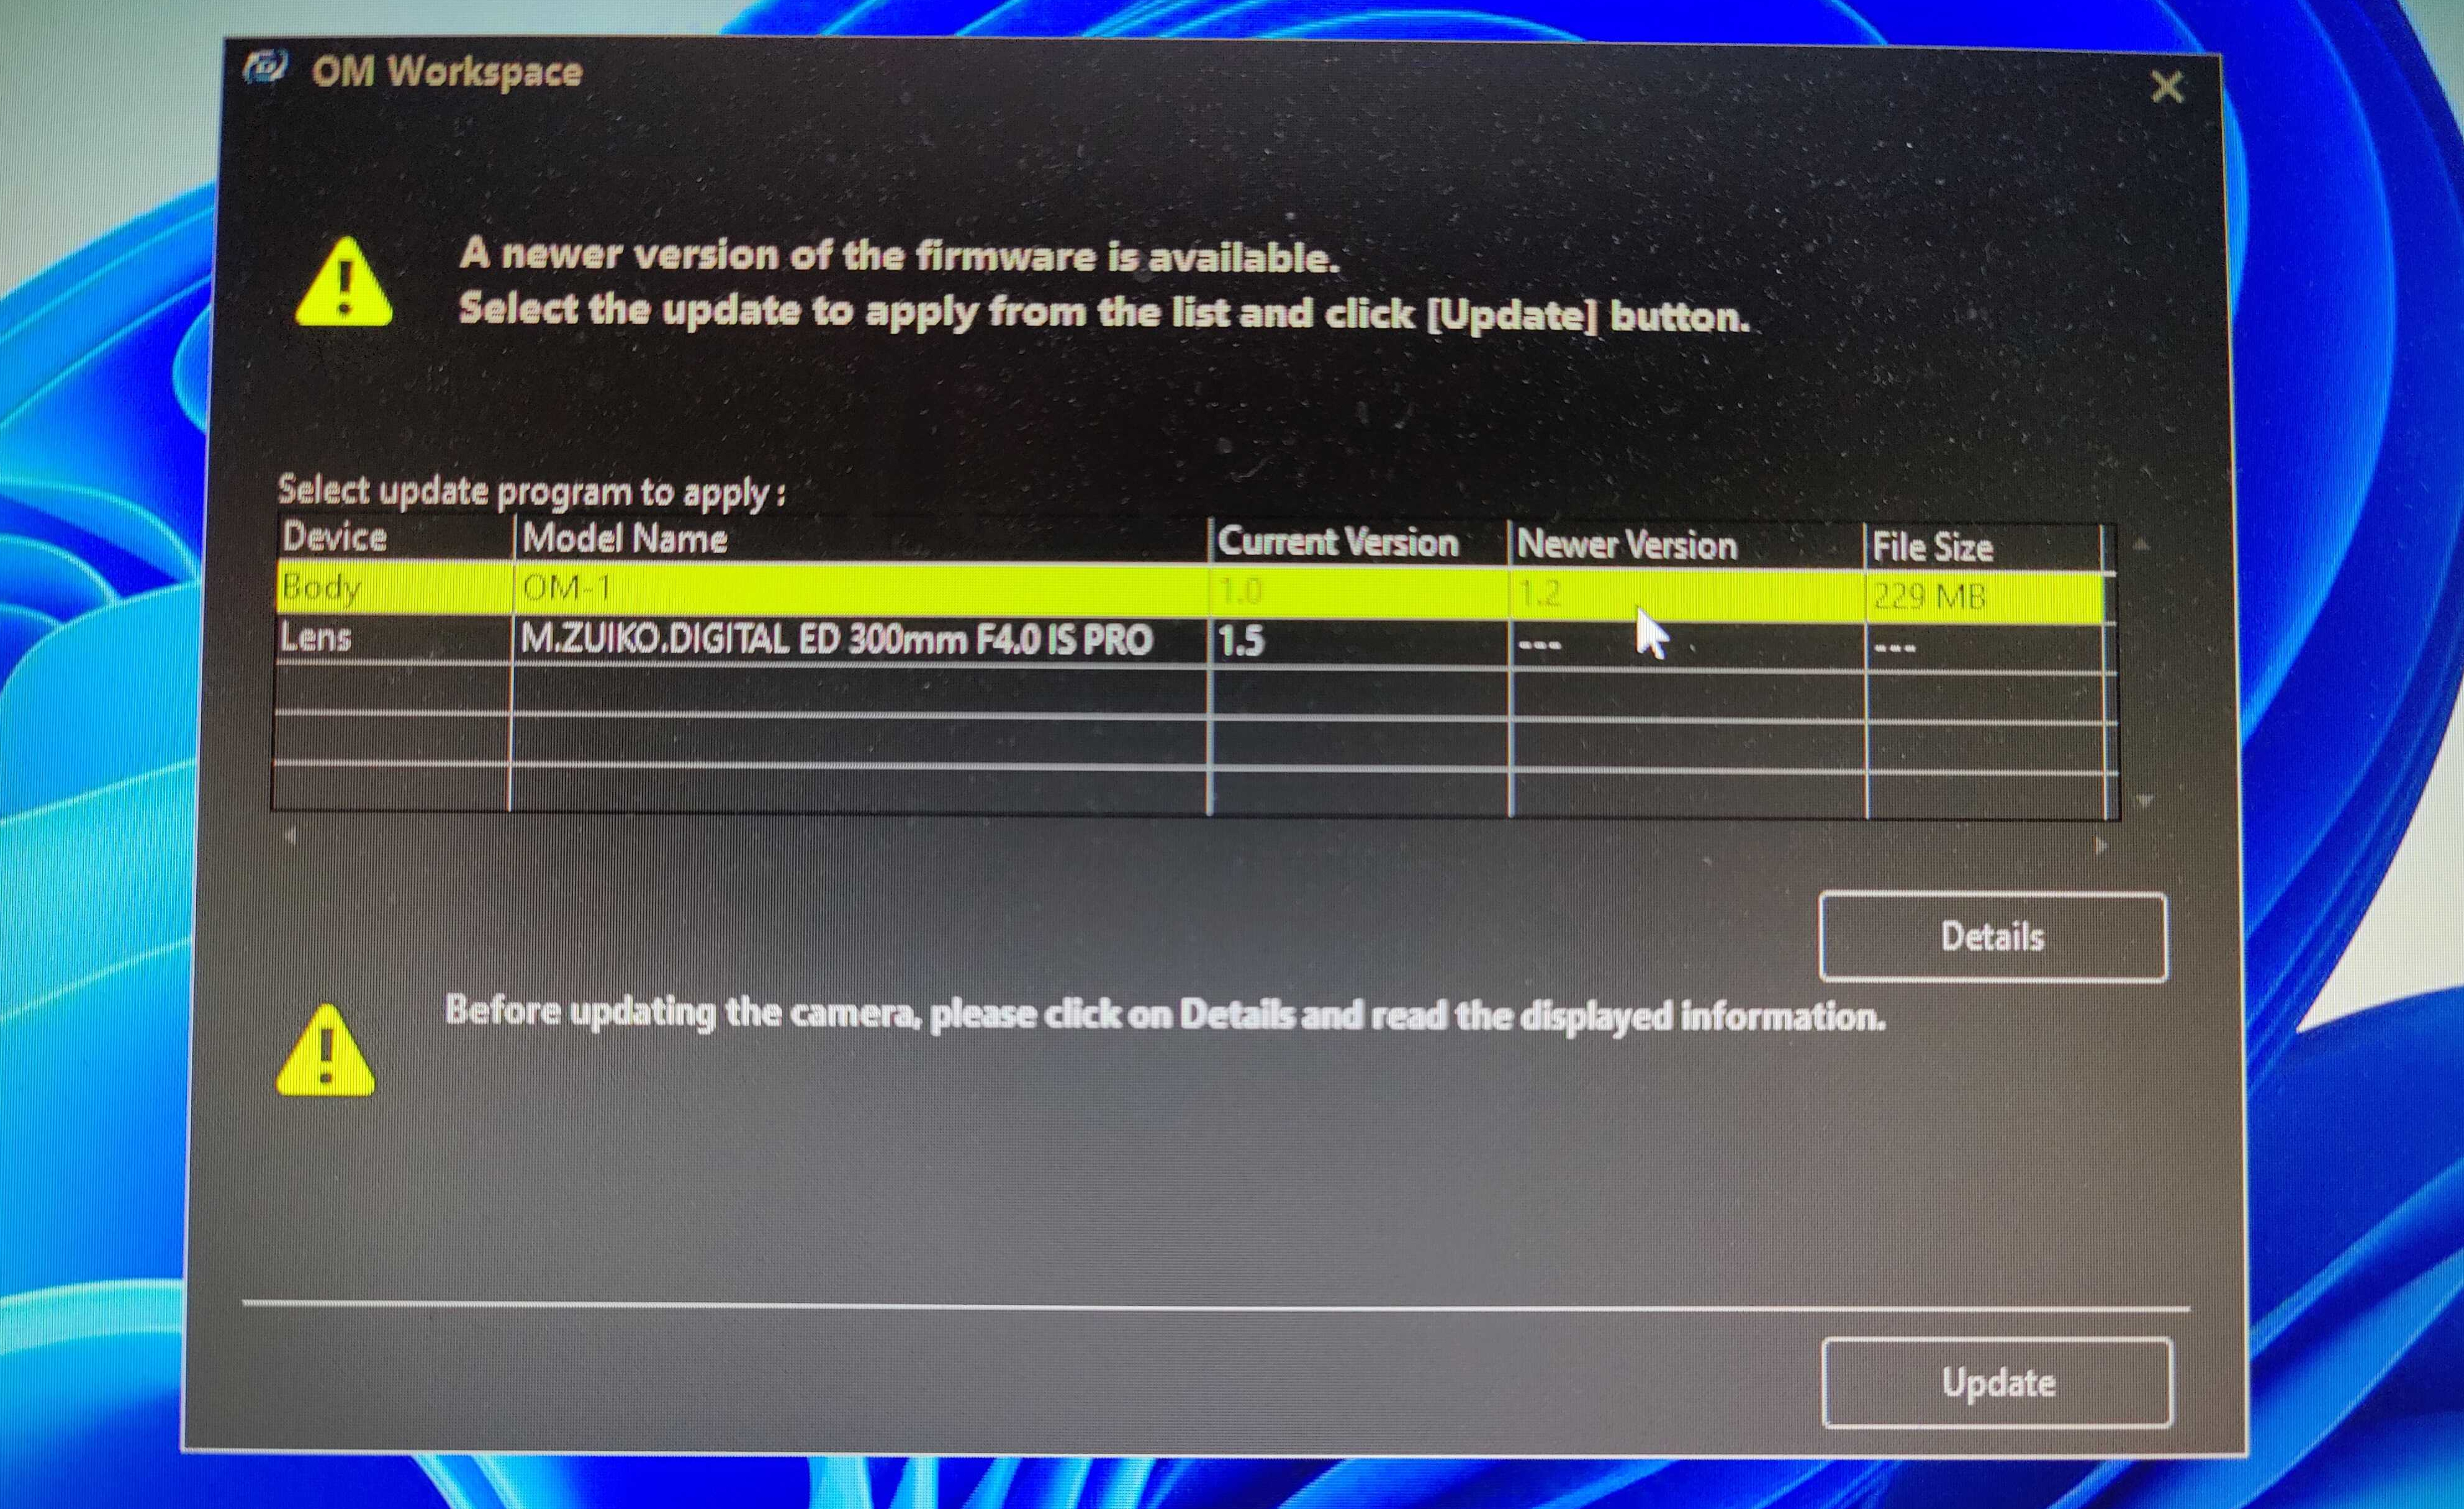
- Select the alternative with the Model Name “OM-1” and Newer Version “1.2”, and then click on the
Updatebutton. You will then be presented with a dialog informing you that you cannot revert to an older version of the firmware.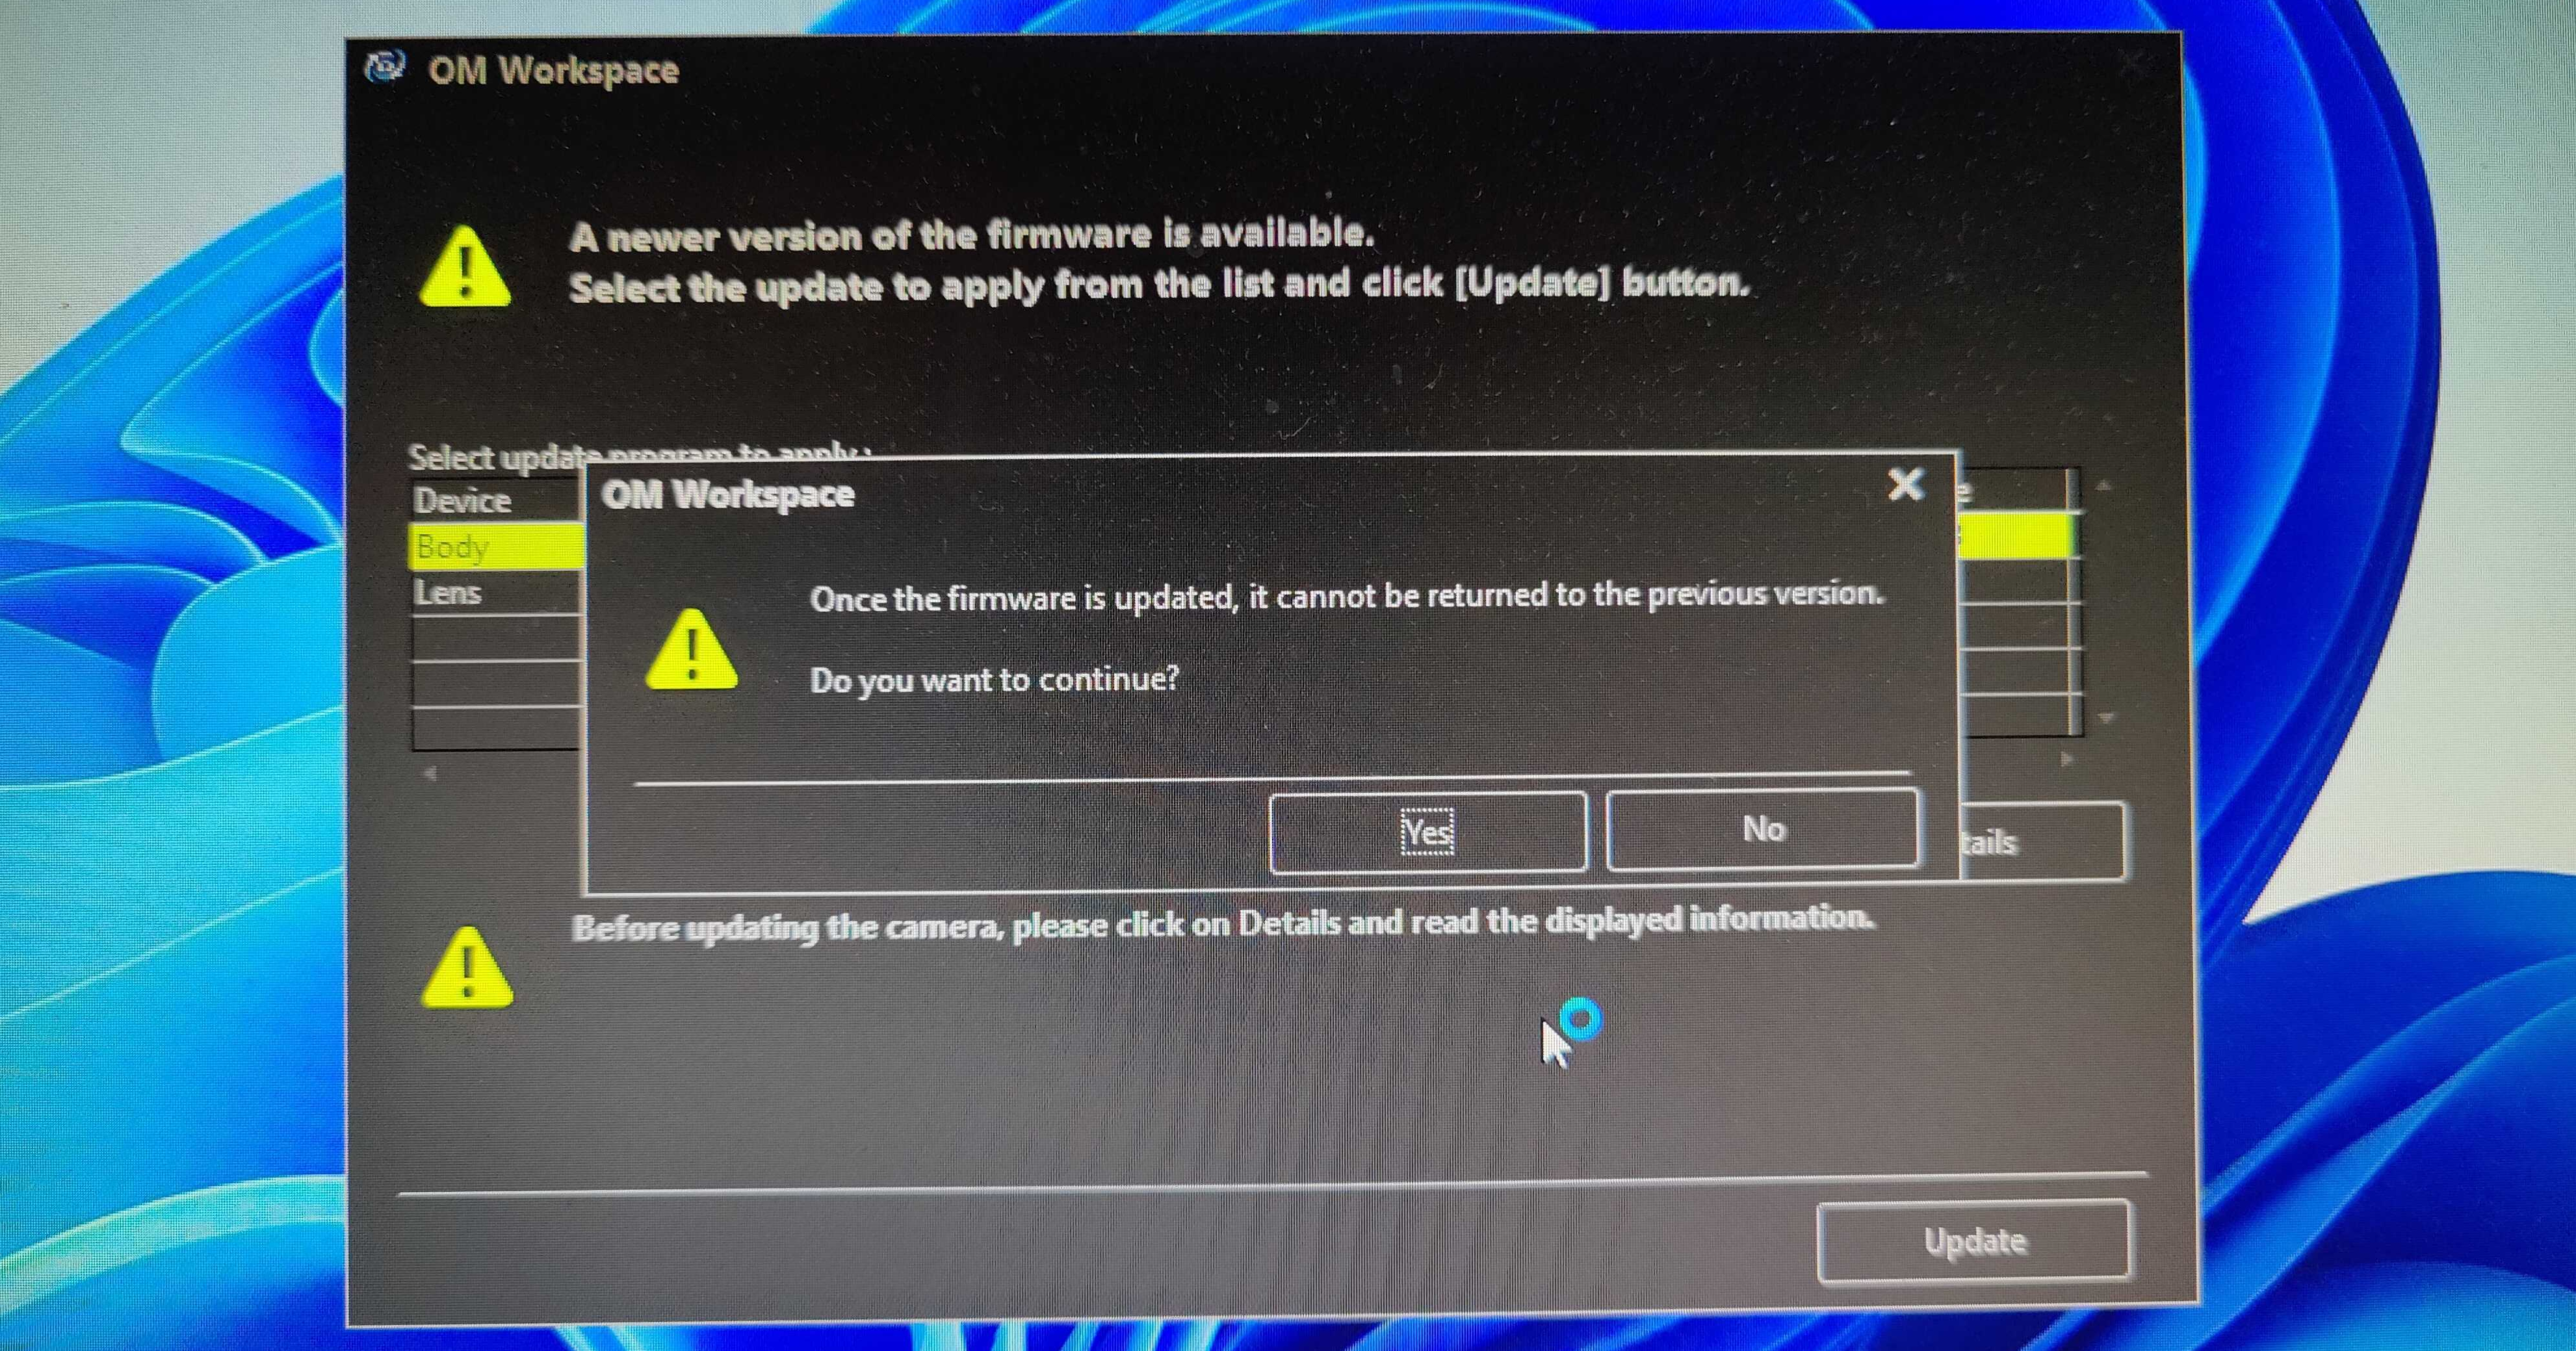
- Click the
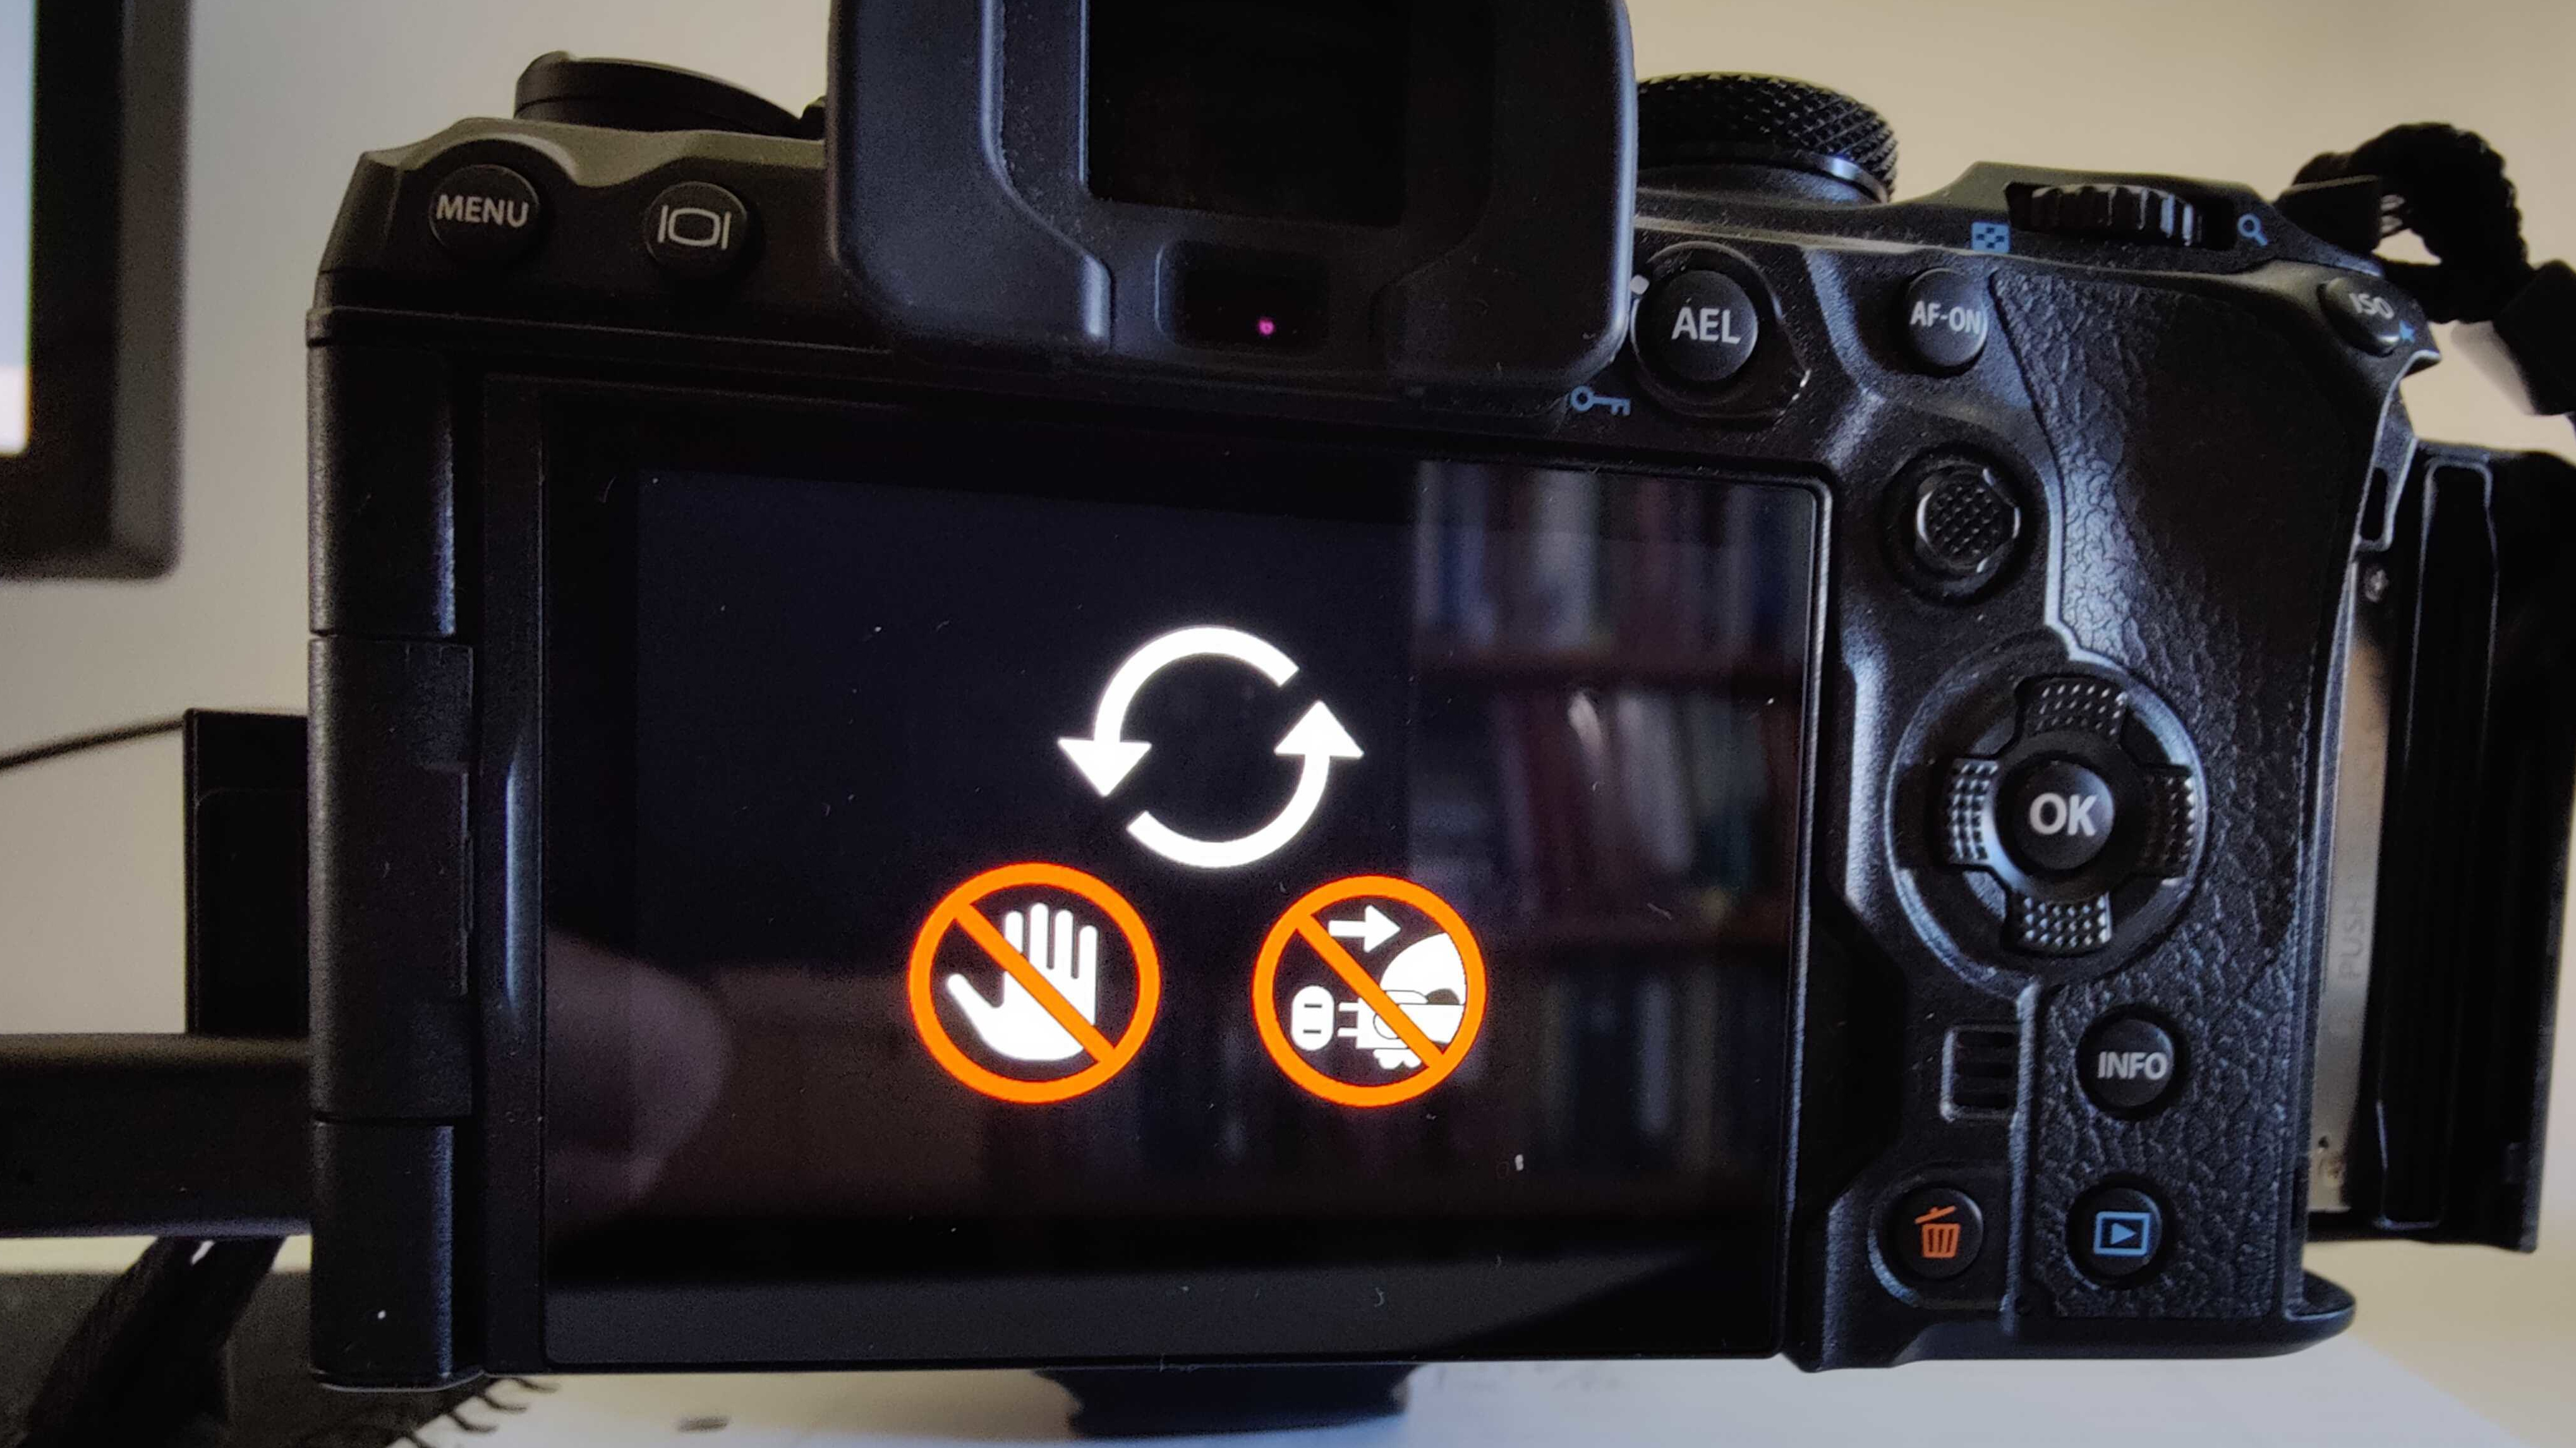
Yesbutton to continue. After that a dialog informing you that the update is in process. First it will download the firmware and then it will update the camera. After the download is complete another dialog will be presented, informing you to wait until the text “OK” is displayed on the camera monitor. During the update the monitor on the camera will show you to icons indicating that you should not disconnect the camera or try to use it for other purposes. For me the update took 3-4 minutes.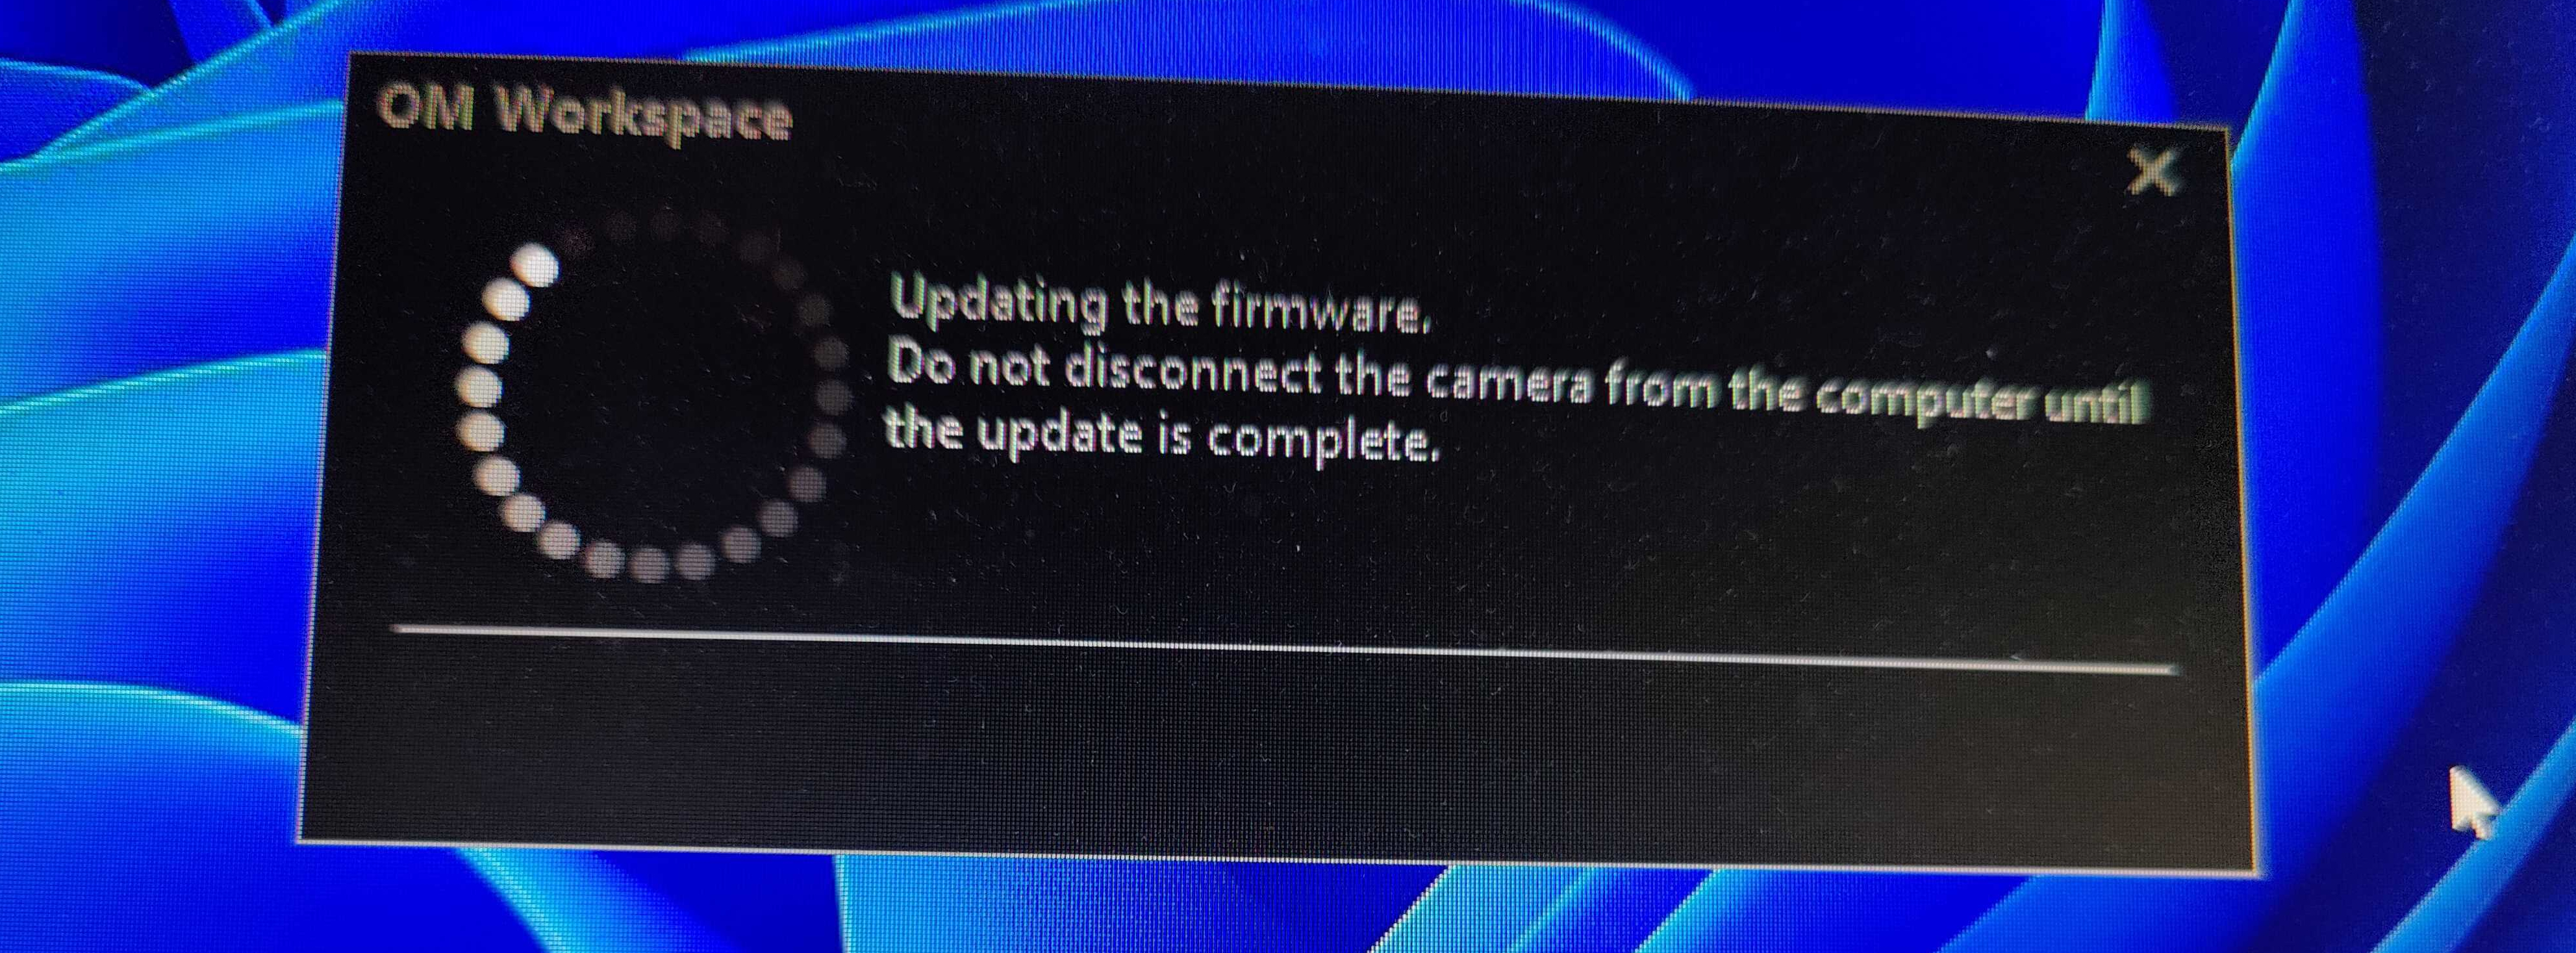
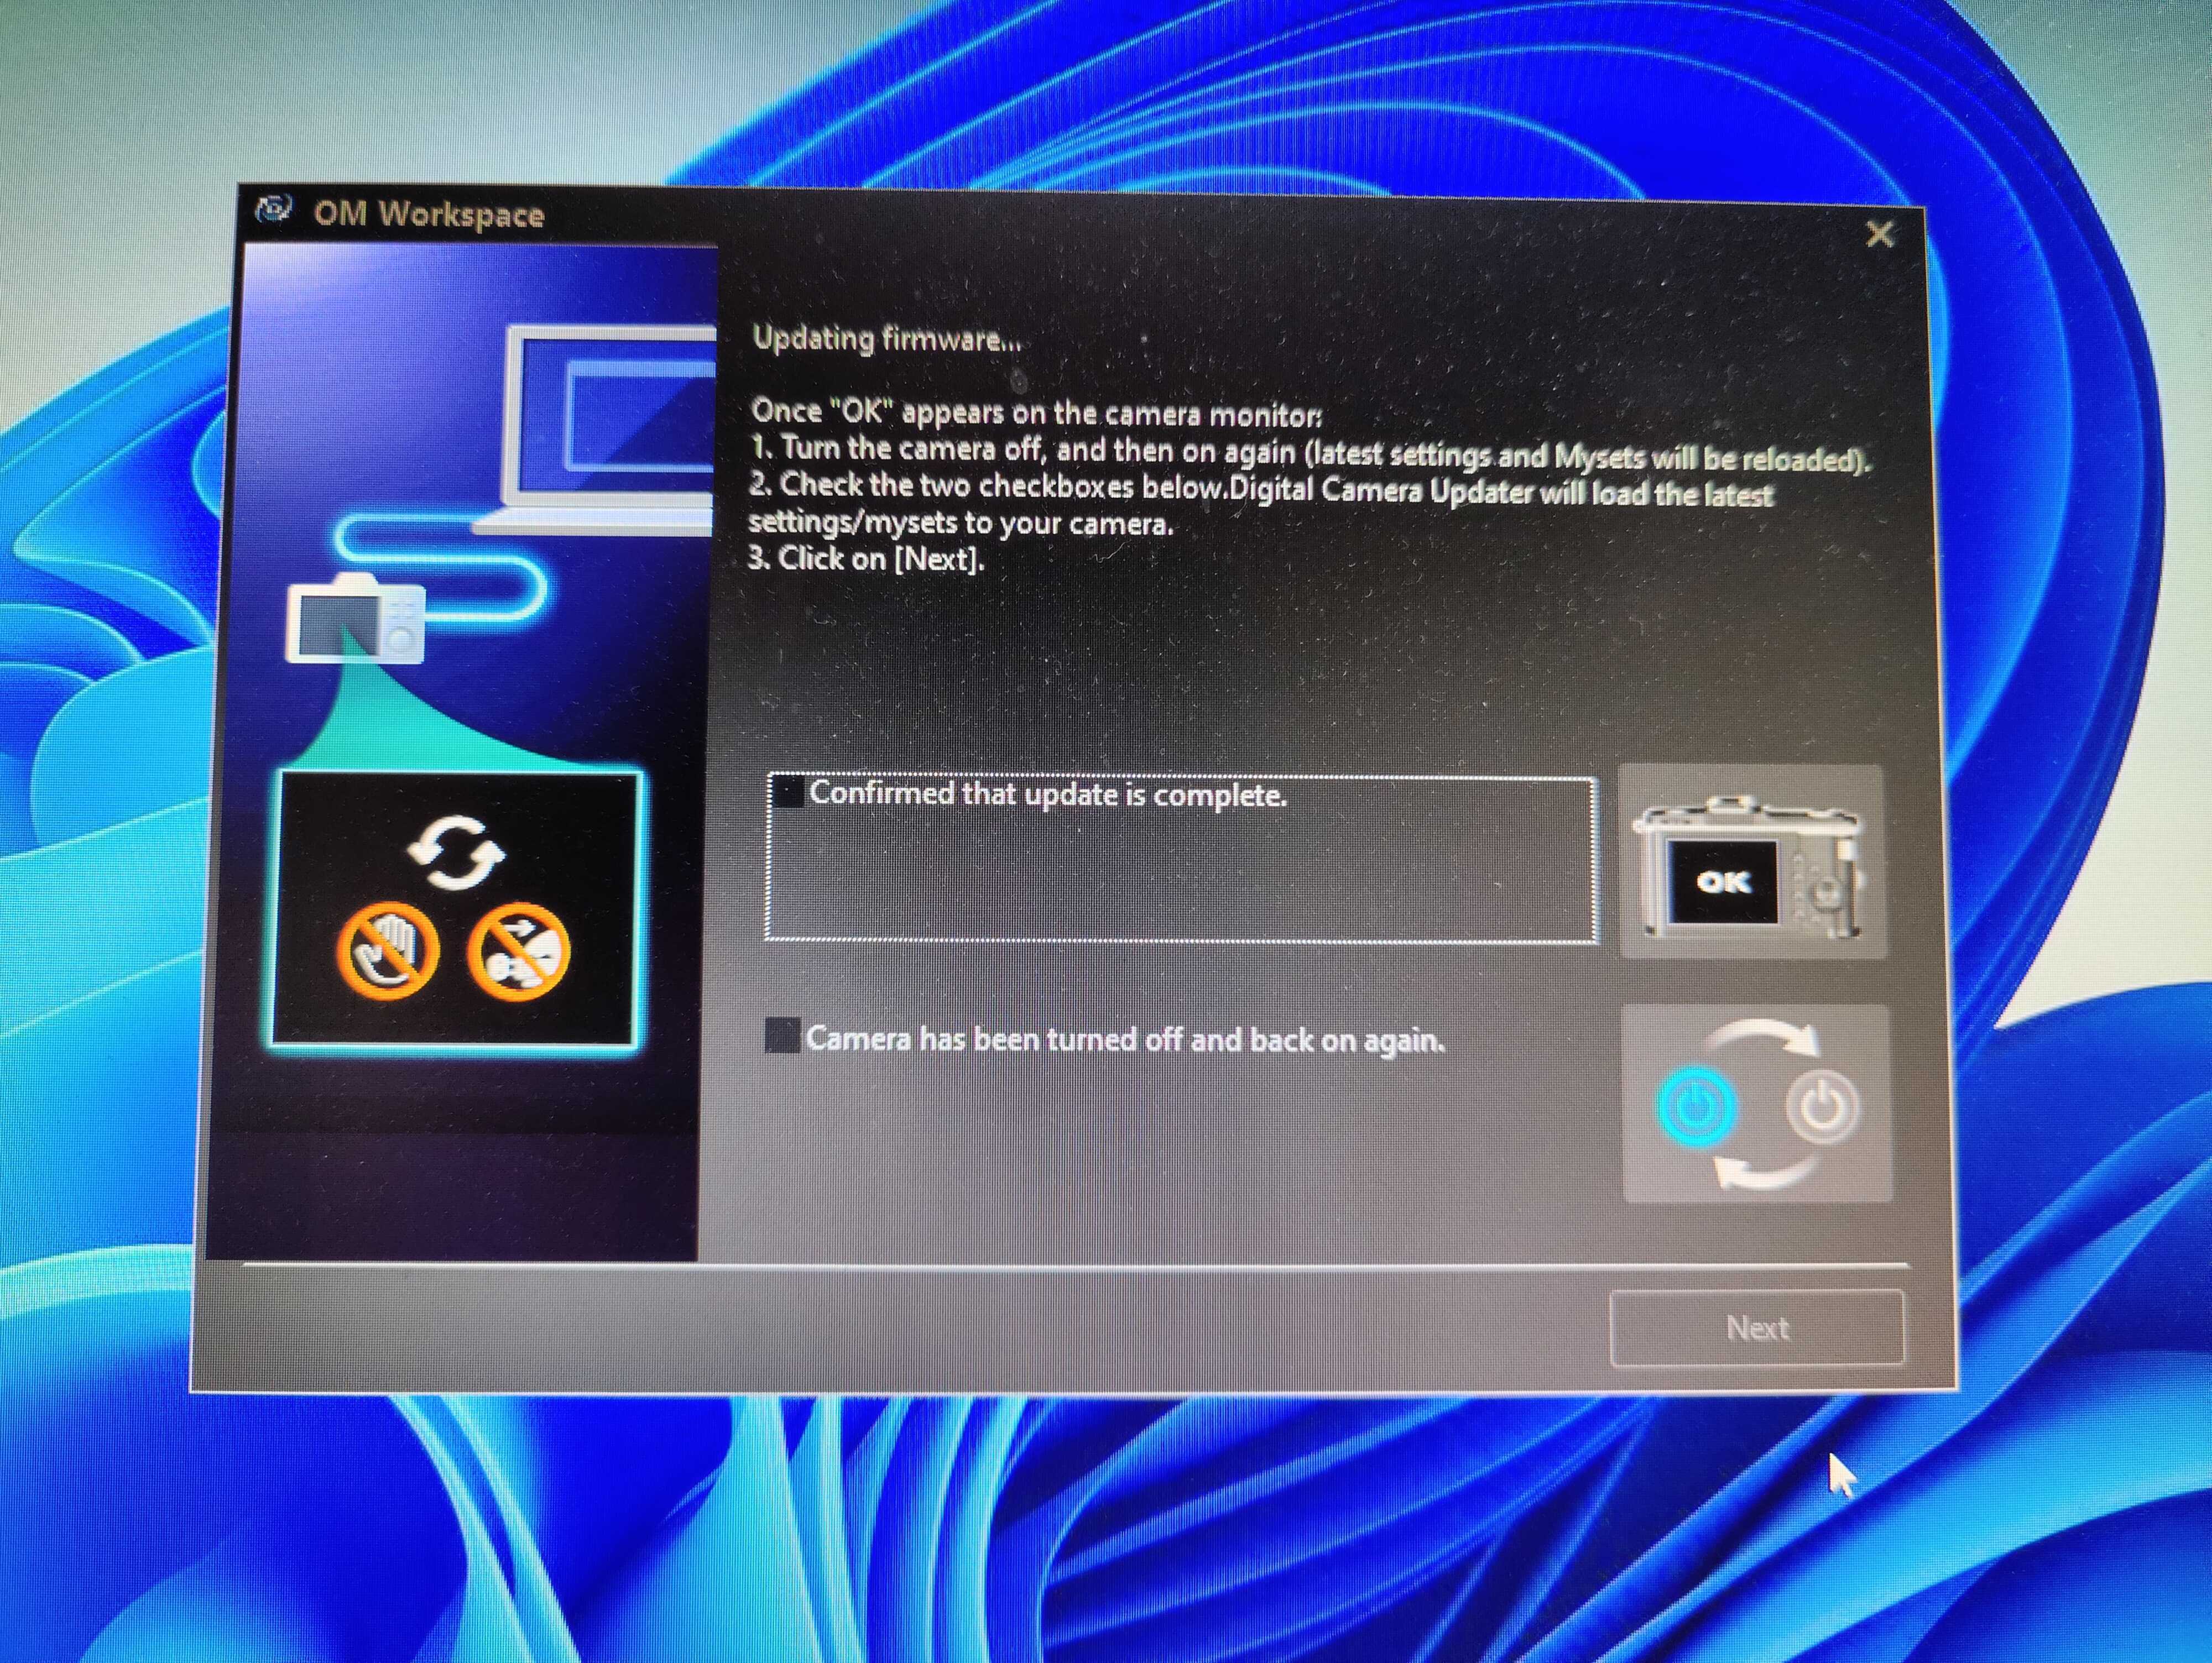
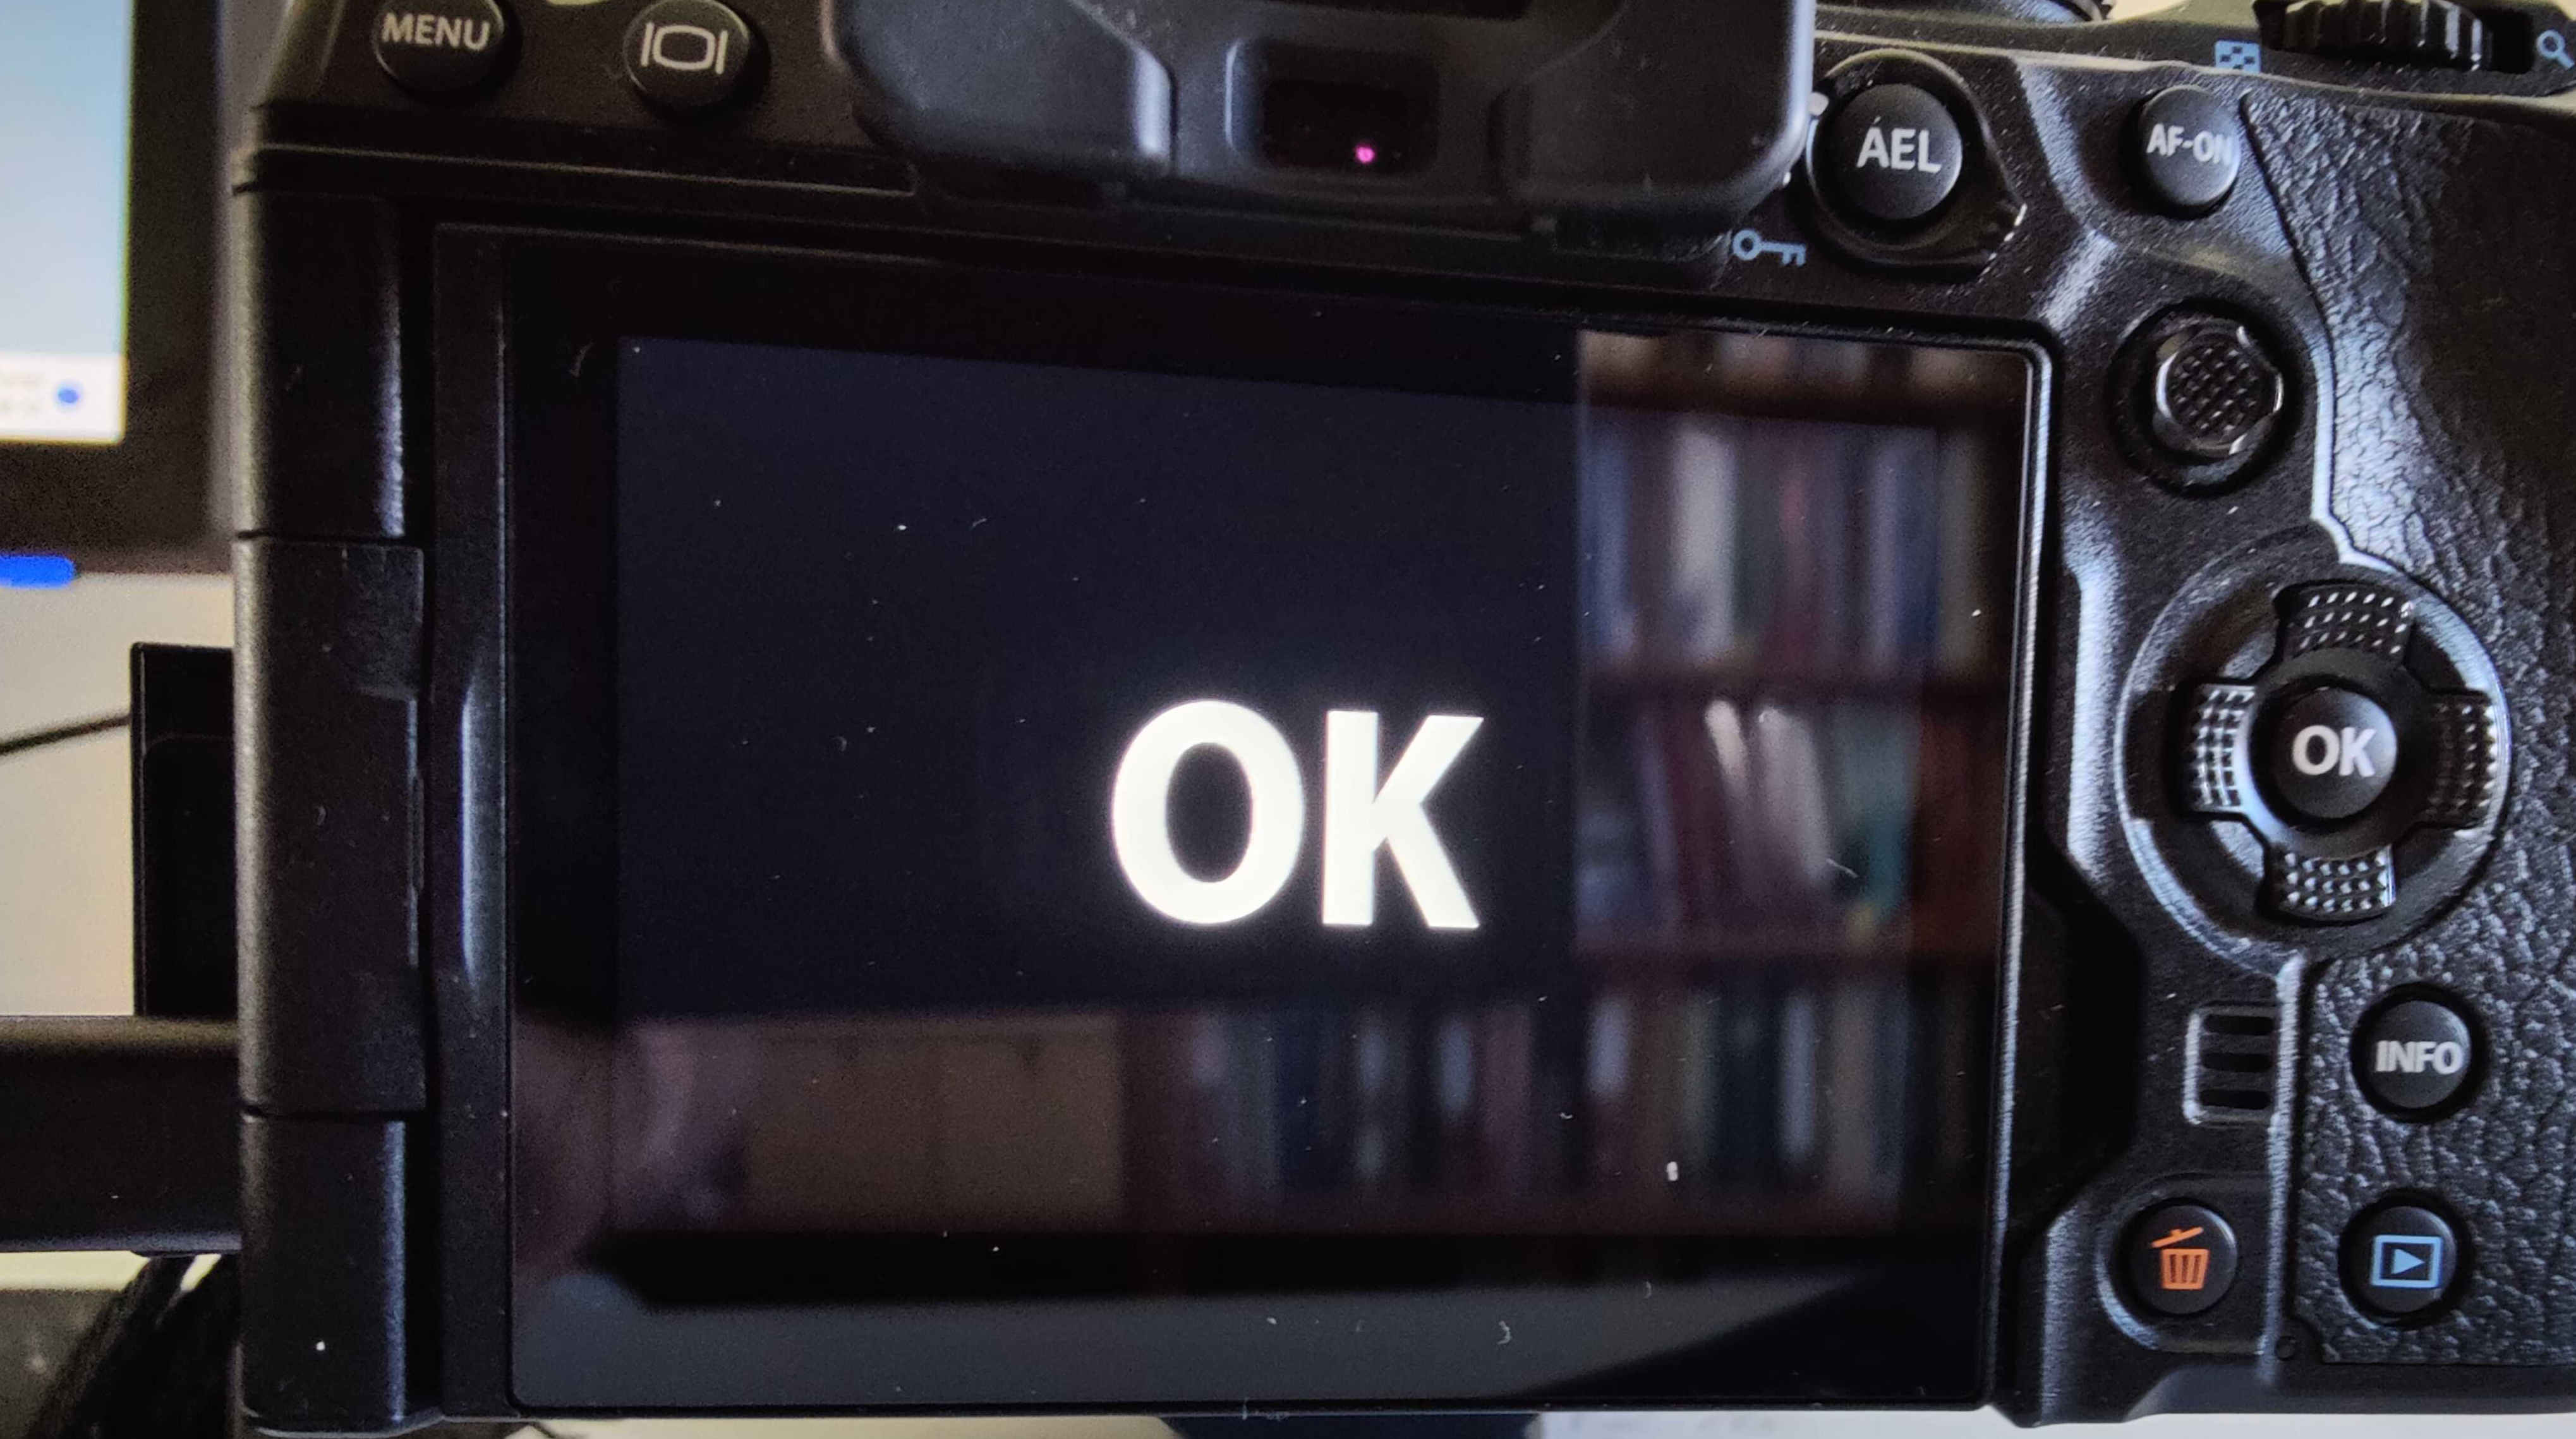
- When the update is complete the monitor on the camera will display the text “OK”.
- Now you can check the checkbox “Confirmed that update is complete” in the dialog above. Then turn off and on the camera, and check the checkbox “Camera has been turned off and on again”. Then click on the
Next button. You will now be presented with a dialog informing you that your latest settings are being reloaded to the camera, and you should not turn off the camera.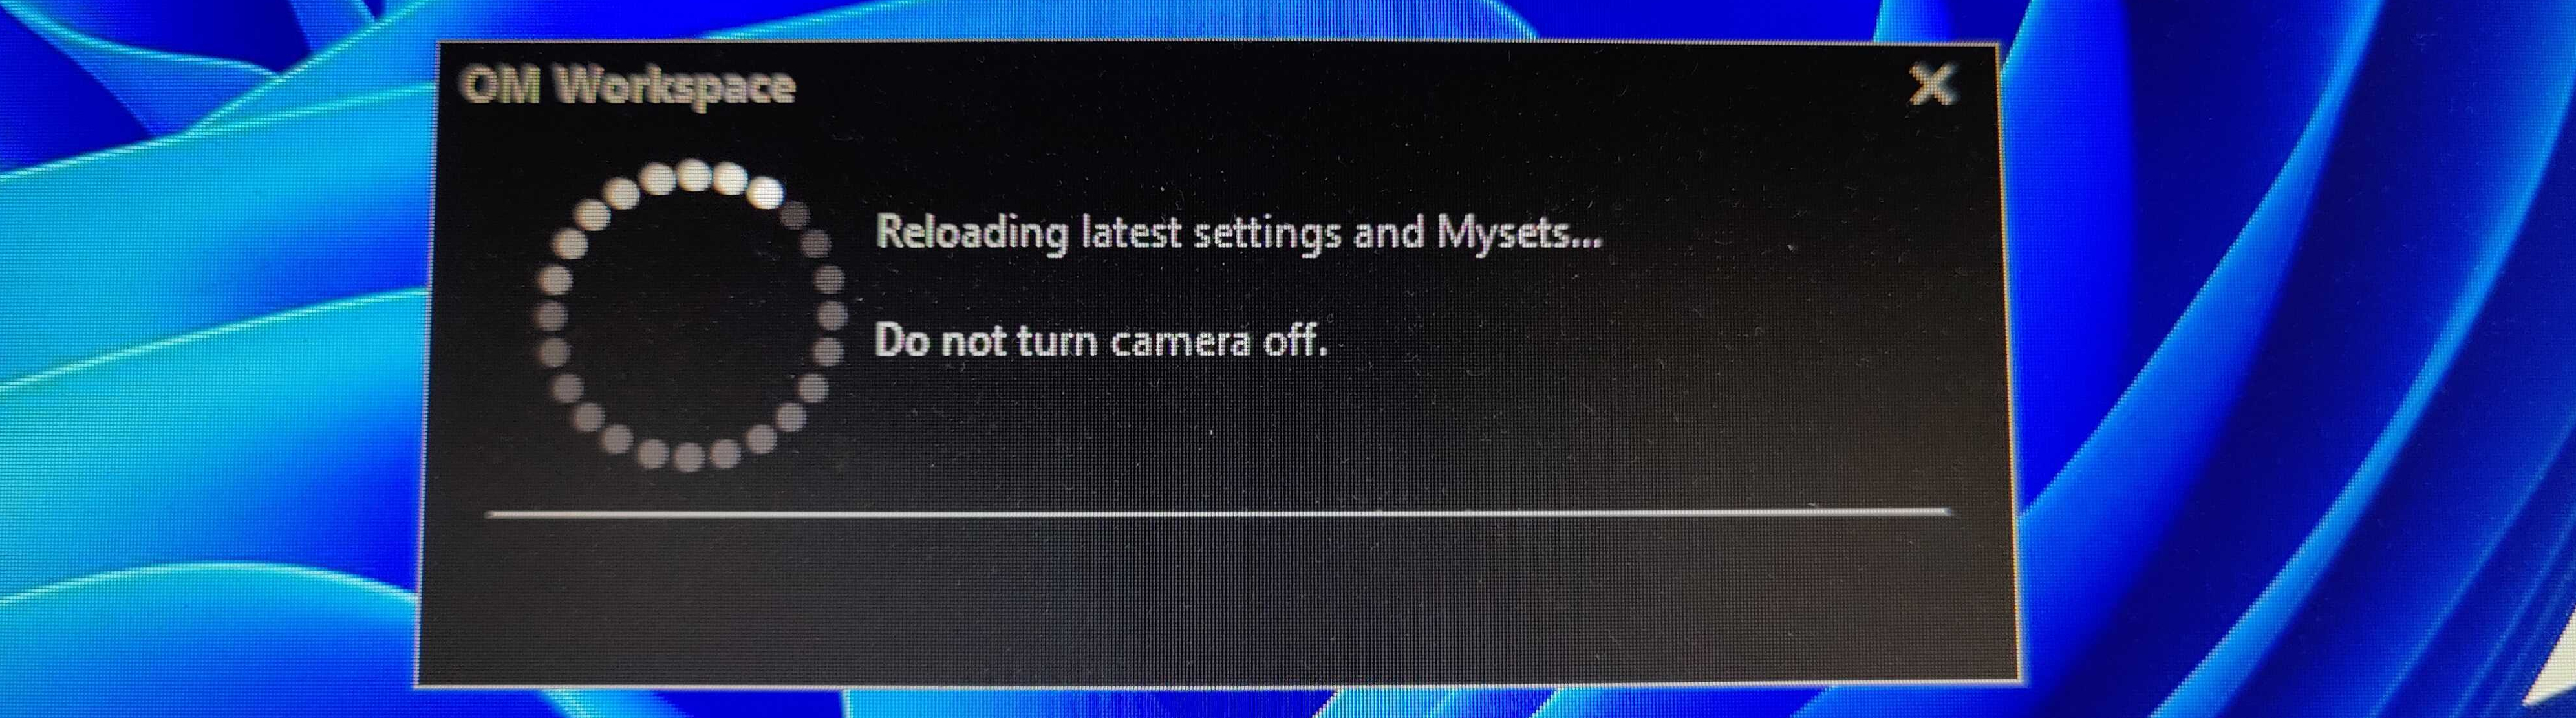
- After a little time (<30 seconds) you will be presented with the final dialog confirming that the firmware update is complete and the settings have been reloaded. Select the
Close button. - The camera monitor will now once again present the menu where you can select the USB mode of the camera. To finish up everything by the book, select
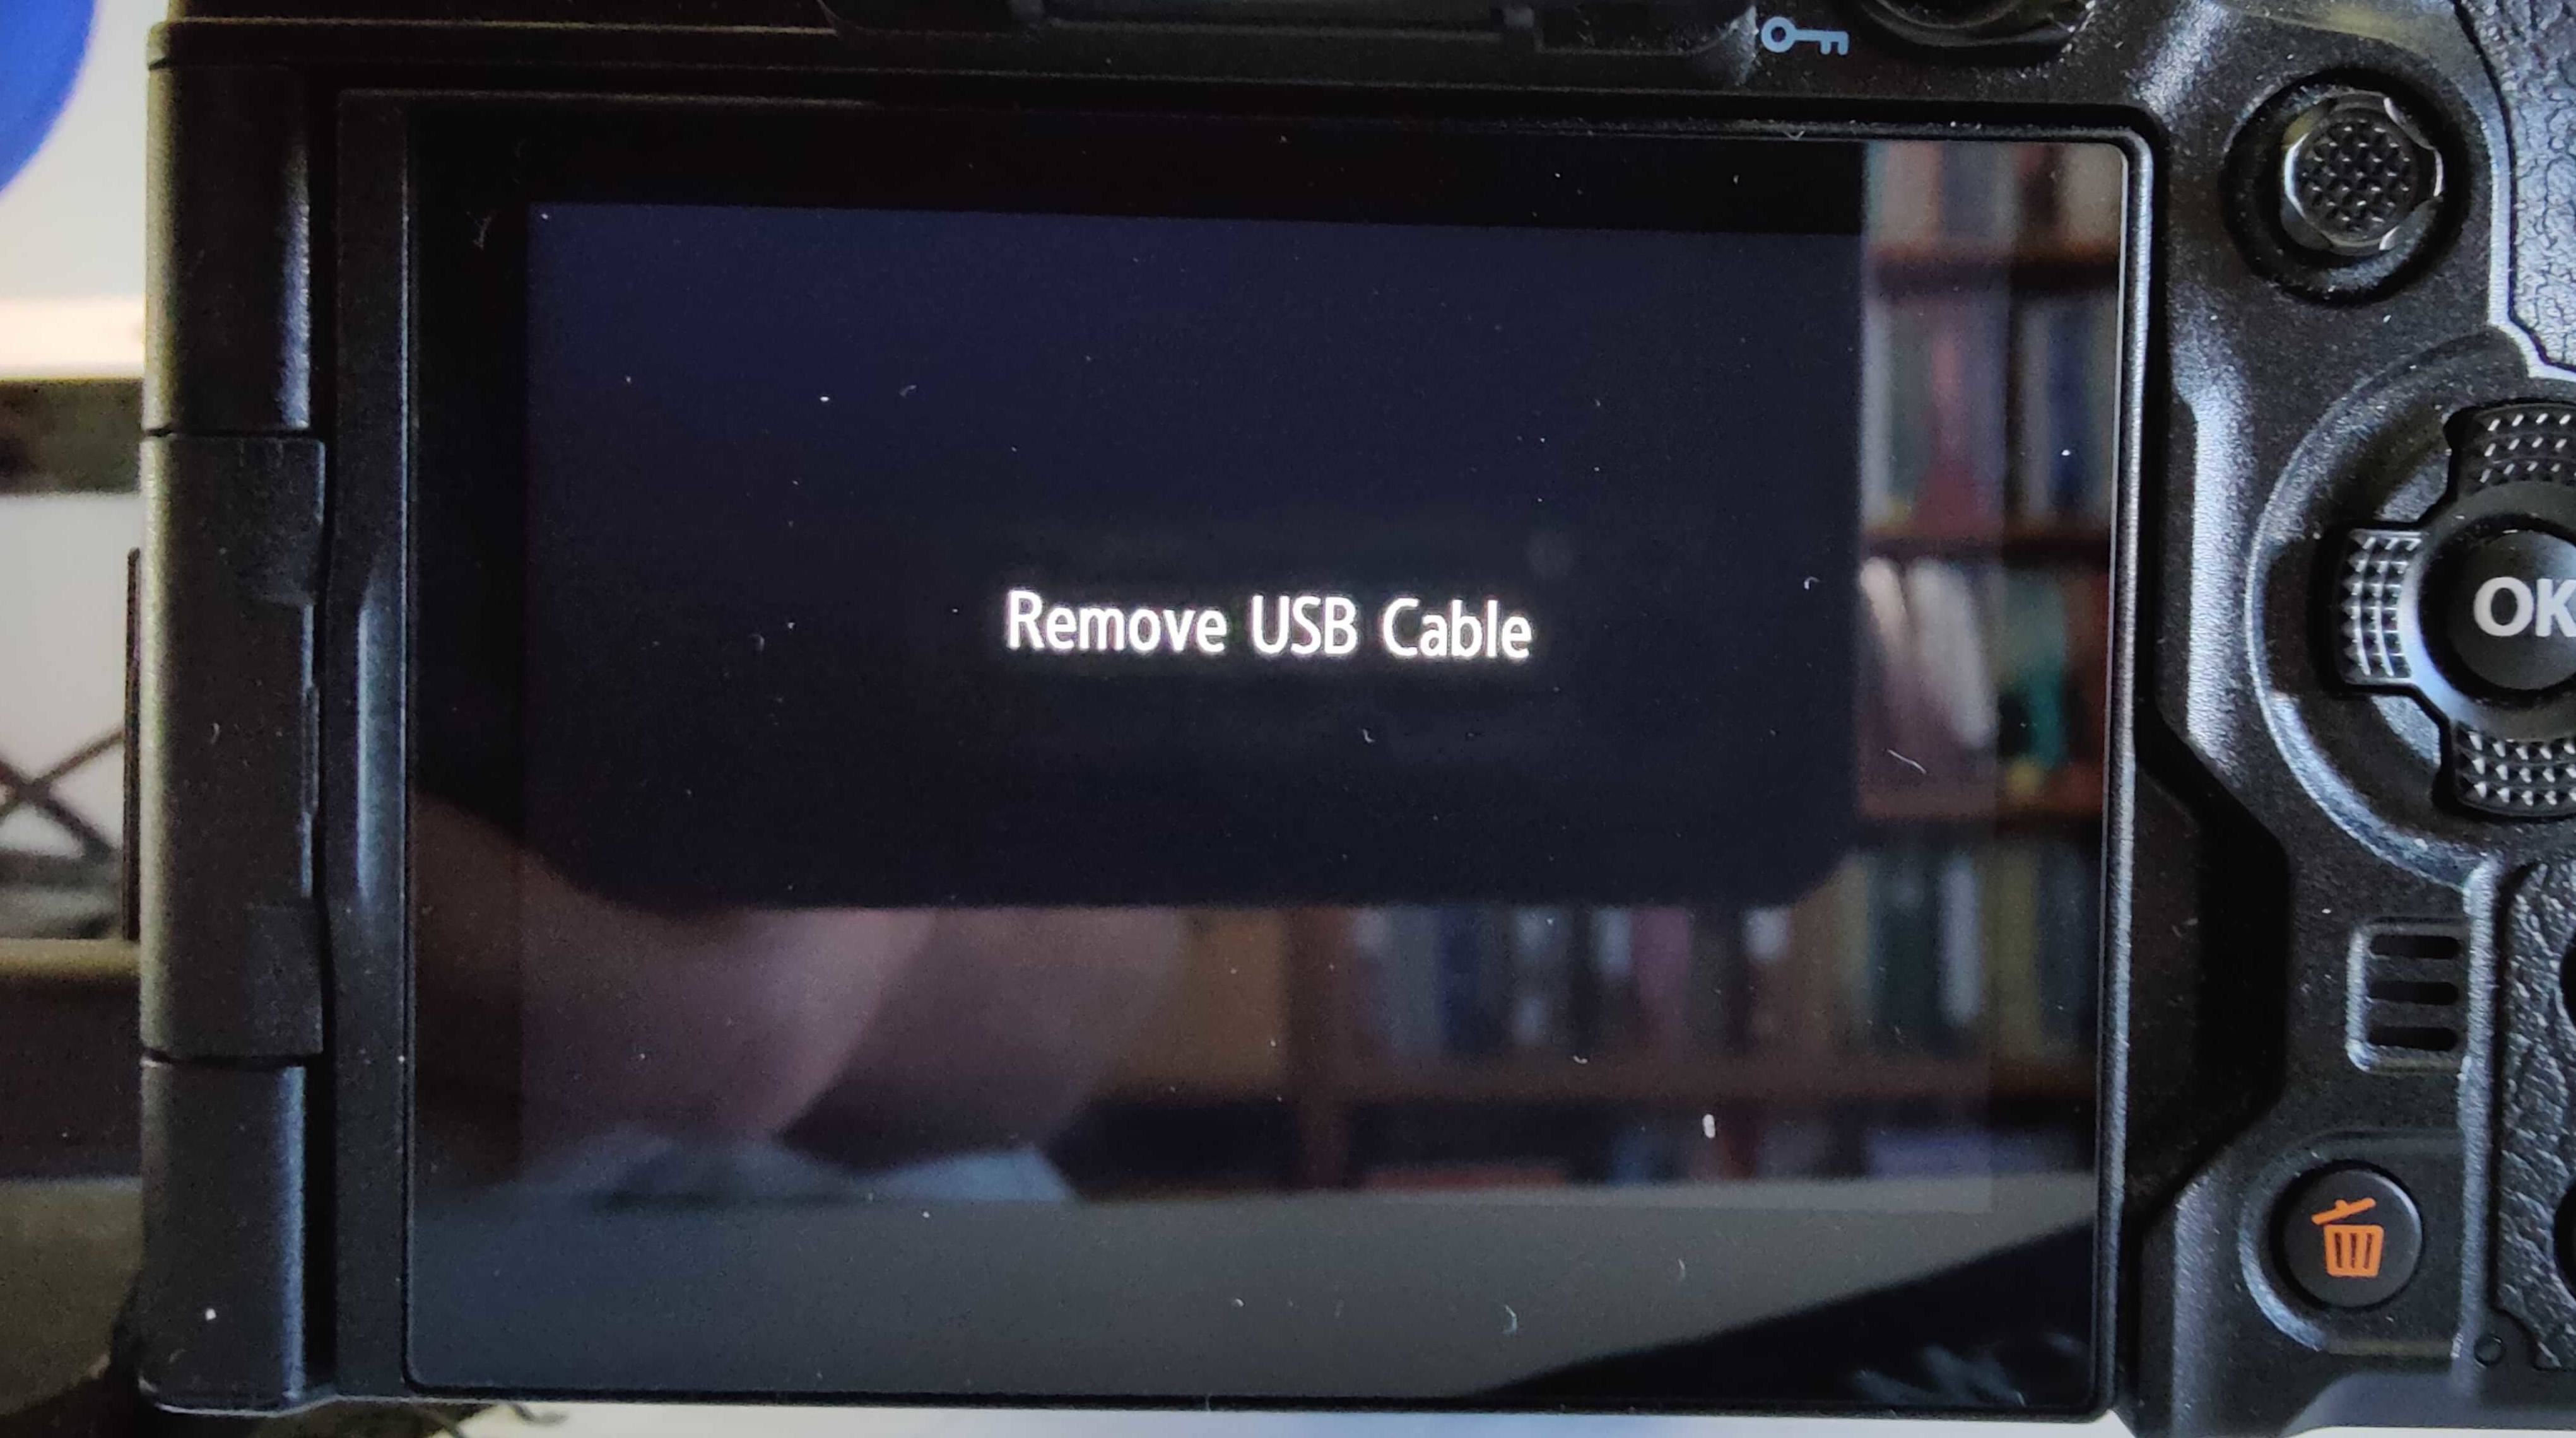
Exit and the monitor will then inform you that you can “Remove the USB cable”. Do so.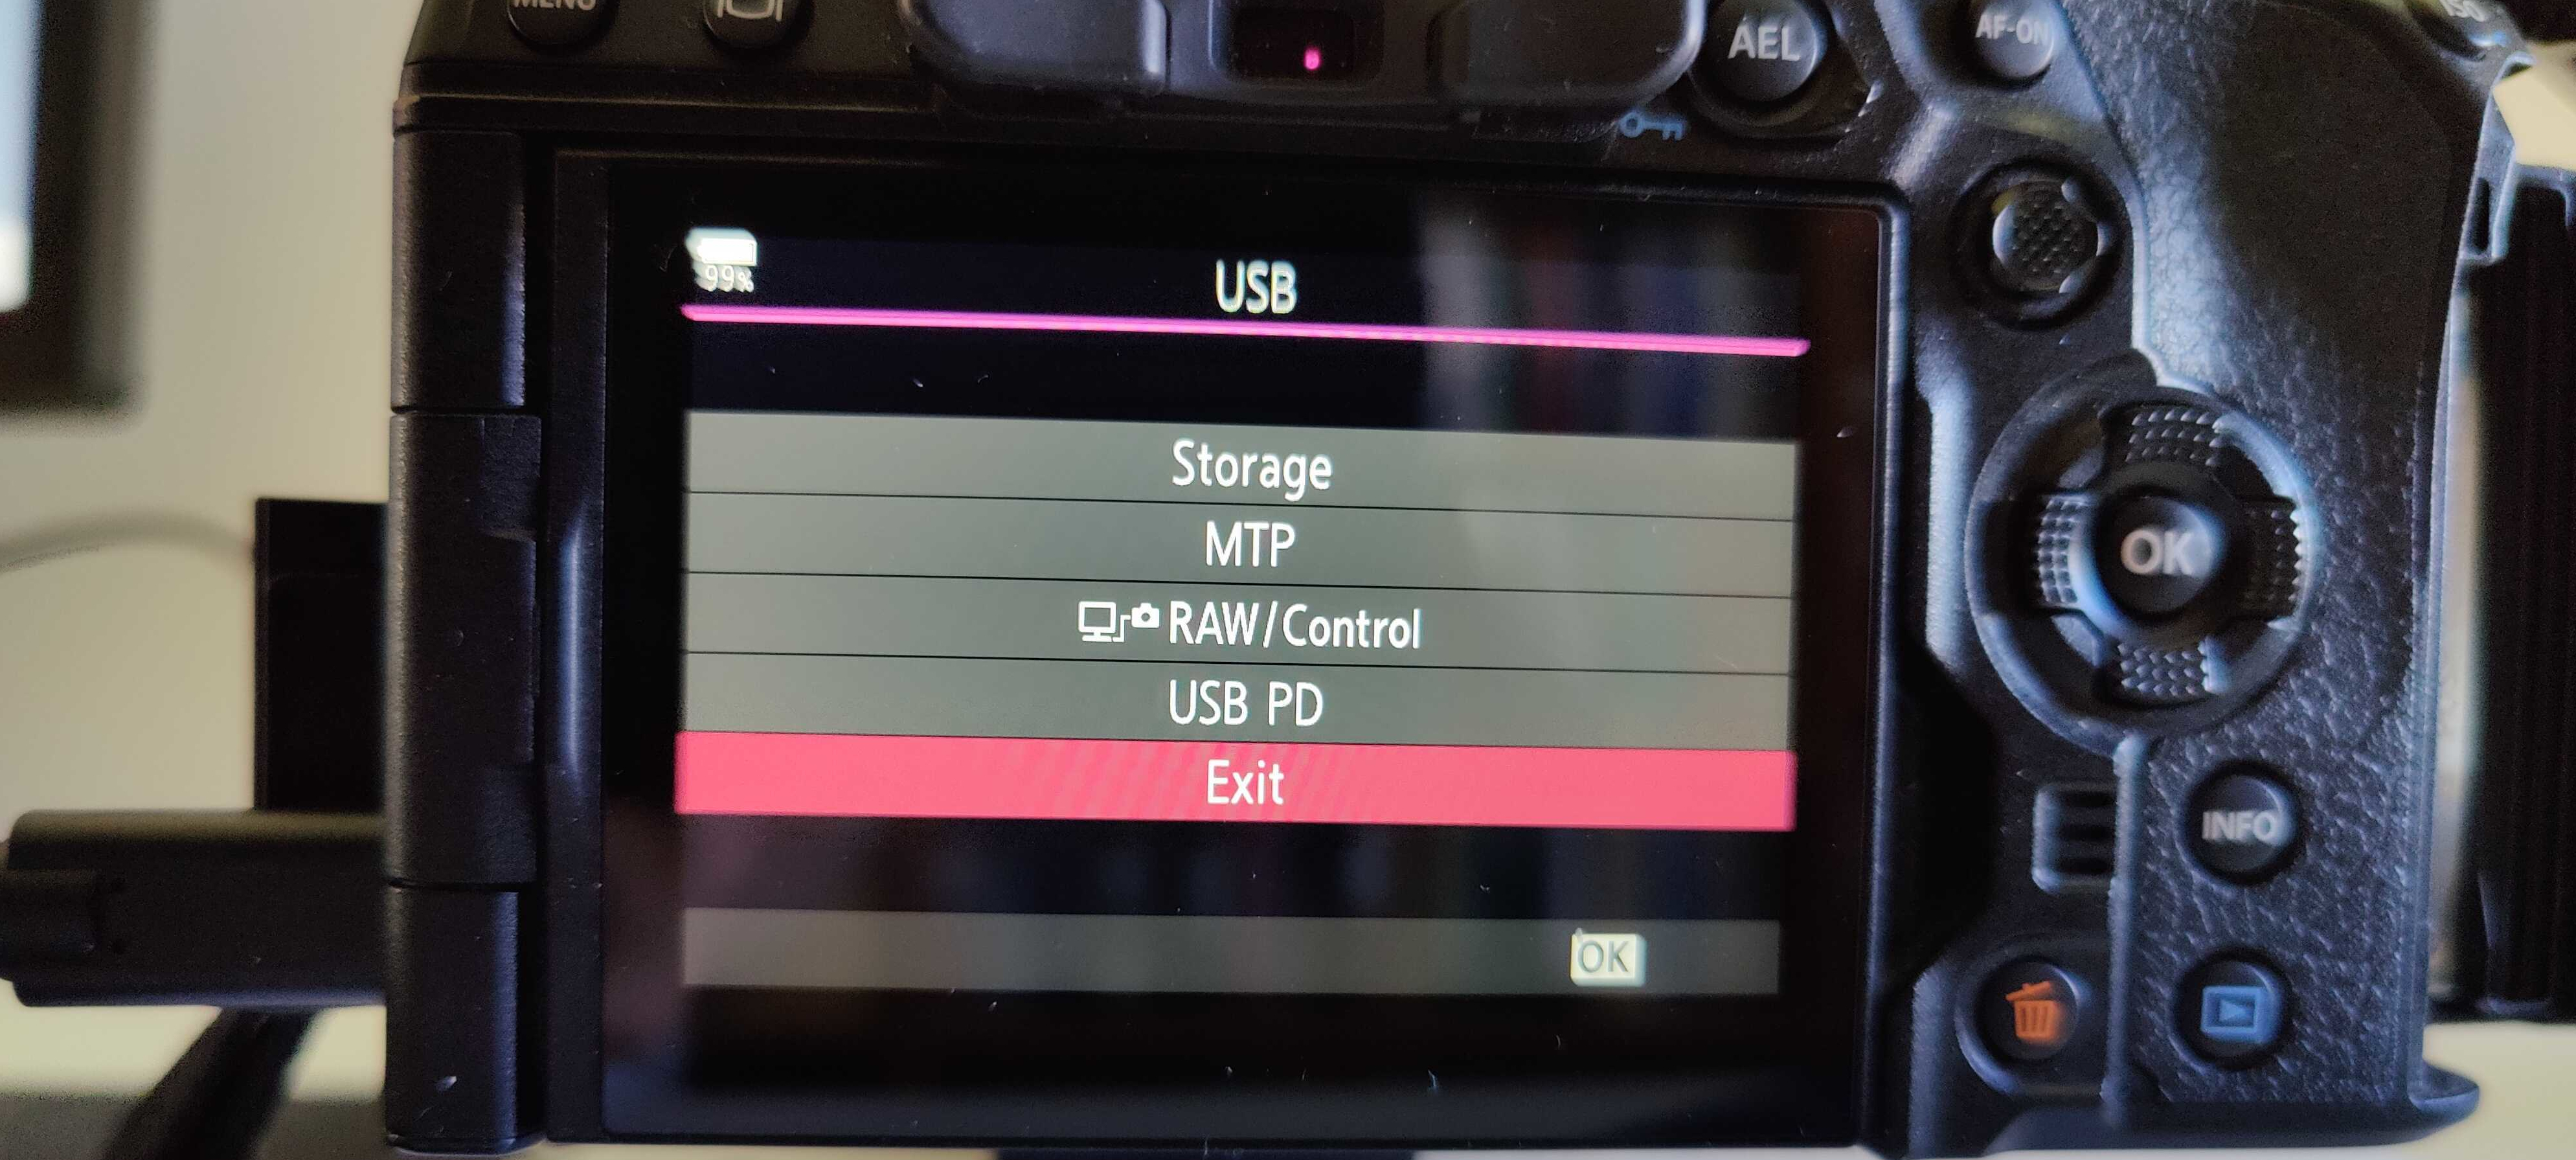
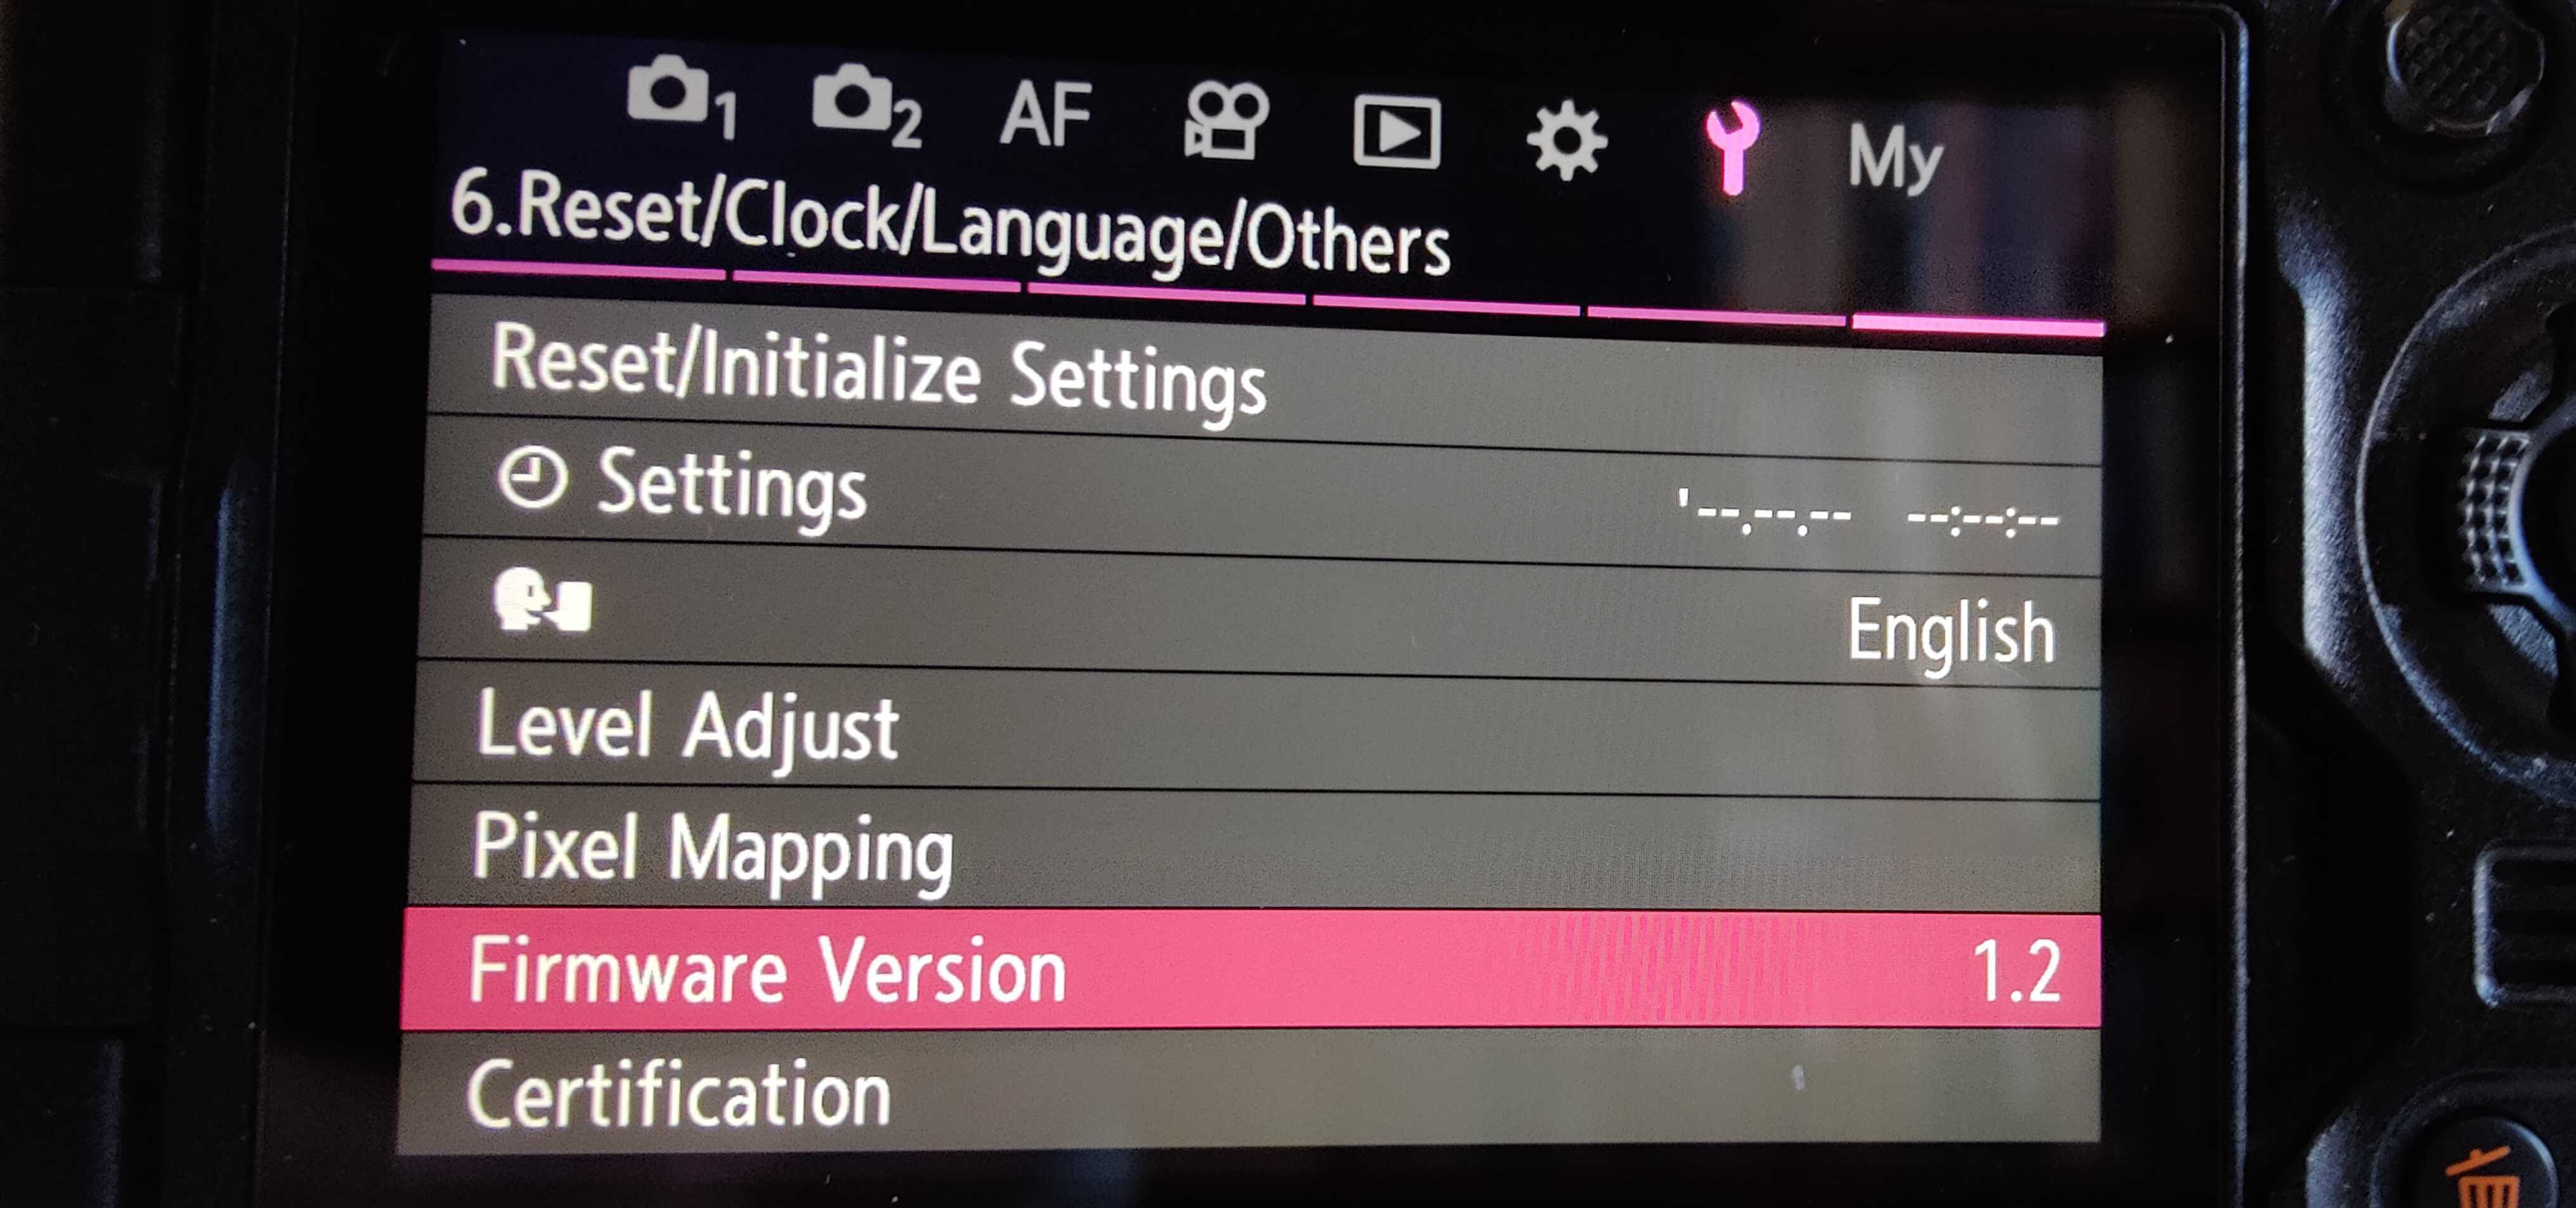
- You can now verify the firmware version in the camera by in the tools menu in the camera.
That’s it!
The web pages of OM System have some room for improvement. It is not obvious which is their main domain name and there are a number of similar looking web pages. One main web site is at www.olympus-europa.com, but the OM Workspace program is downloaded from www.olympus-imaging.com and the guide for updating the firmware was at https://getolympus.com. Someone at OM System should tidy that up and make sure there is one official domain name to start at. My guess is that organizational rivalry in their marketing departments and too many web strategists could be a root cause here …